
Static-site generator (SSG) is a build tool that produces static sites. These sites have pages built beforehand and don't change between user visits. SSGs like Hugo usually take templates to create the HTML pages. Since creating sites with an SSG can be achieved in a few steps, SSGs are great tools for newbies and those with limited website building experience.
Hugo is one of the most popular open-source static site generators built for blogs, docs, and portfolios. It was built in Go programming language and as its nature, generating static sites with Hugo is so fast. With its robust theming system and hundreds of themes available for different uses, it’s really easy to get a website up and running within minutes. A key advantage that sets it apart from other SSGs is how fast it builds pages. It provides amazing content management, is available on multiple OS platforms.
Getform is a form backend platform built for developers and designers that handles form submissions on static sites and sends submissions via email.
Getform also provides enhanced spam protection, form automation that includes fill & download forms, automatic responses, custom email notifications for new form submissions and offers connection to 3rd party services such as Google Sheets, Slack, Trello and more through Zapier and Integromat integrations.
In this guide, you will discover how to create a simple Hugo site, setup an HTML form with file upload functionality and manage the file and text submissions data through Getform's easy-to-use dashboard. We will also setup a fill & download form redirection action where we will let our visitors download a pre-defined file after successful form submission.
Before getting started, sign up for a free Vercel and Getform account.
Step-1: Generating a Hugo site
Installation
If Hugo is not installed yet, you can install it by running the following command.
$ brew install hugo
To create a new site, select a location for the site source code. Pick a site name and run the following command on your terminal in the location you picked.
$ hugo new site <site-name>This command will generate a skeleton for your site. You may optionally choose to add a theme instead of building the site from scratch. You can find a range of themes at theme.hugo.io. In this example, we will stick with the default Ananke theme.
Adding a Theme
Download the theme from GitHub and add it to your site’s themes directory:
$ cd my-hugo-site
$ git init
$ git submodule add https://github.com/theNewDynamic/gohugo-theme-ananke.git themes/ananke
Then, add the theme to the site configuration:
echo theme = \"ananke\" >> config.toml
To run the site locally, with the Hugo server, the theme, and some example configuration, run:
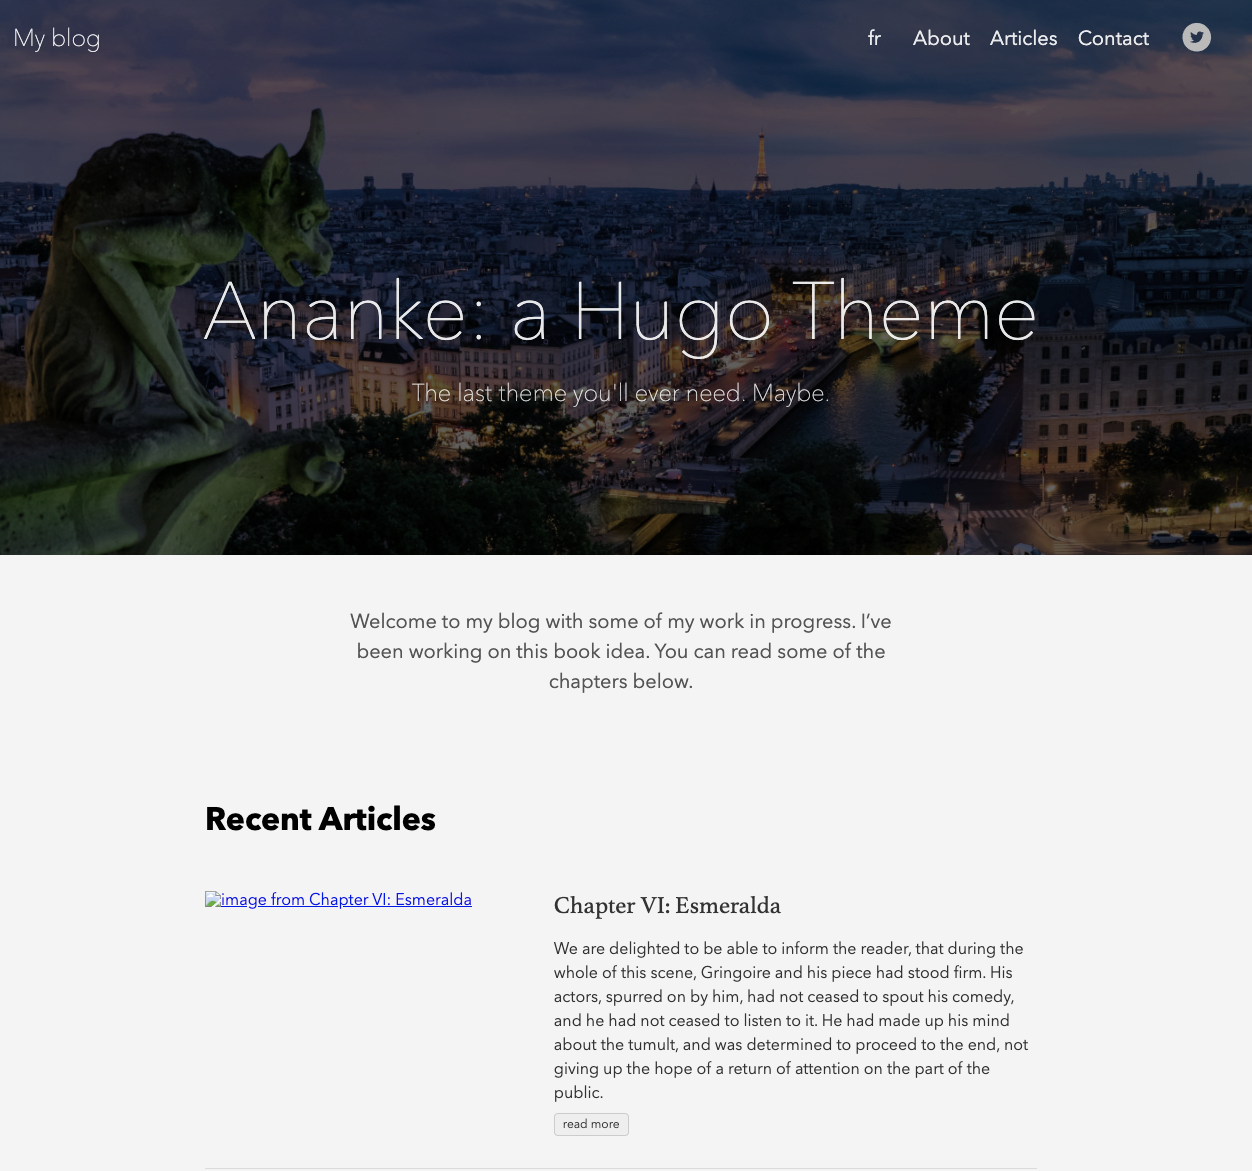
$ hugo server -D Hugo will start a hot-reloading development environment accessible by default at localhost:1313 which will look like as follows:
Step 2: Create your form endpoint on Getform.io
Visit your Getform Dashboard and create a new form endpoint. Getform will ask you to name your form endpoint and the timezone of the endpoint.

With your form endpoint created, you can then copy the form's endpoint from the endpoint overview page. This will be used in your Hugo site as a place to submit your form data.

Step 3: Update the existing shortcode to setup file uploads for your Hugo form
In Hugo, Shortcodes are a means to consolidate templating into small, reusable snippets that you can embed directly inside of your content which means your .md files. In this sense, you can think of shortcodes as the intermediary between page and list templates and basic content files.
In default Ananke theme's example site, there is already a created shortcode for form handling named "form-contact.html" under layouts>shortcodes folder. This directory is where you should place your shortcodes in HTML format. For simplicity, we will be updating the existing shortcode according to our needs. The form code already has name, email and message fields, we will extend the form by adding a new file input and add enctype="multipart/form-data" attribute.
{{ $.Scratch.Add "labelClasses" "f6 b db mb1 mt3 sans-serif mid-gray" }}
{{ $.Scratch.Add "inputClasses" "w-100 f5 pv3 ph3 bg-light-gray bn" }}

<form class="black-80 sans-serif" accept-charset="UTF-8" action="{{ .Get "action" }}" method="POST" enctype="multipart/form-data" role="form">

    <label class="{{ $.Scratch.Get "labelClasses" }}"  for="name">{{ i18n "yourName" }}</label>
    <input type="text" id="name" name="name" class="{{ $.Scratch.Get "inputClasses" }}"  required placeholder=" "  aria-labelledby="name"/>

    <label class="{{ $.Scratch.Get "labelClasses" }}" for="email">{{ i18n "emailAddress" }}</label>
    <input type="email" id="email" name="email" class="{{ $.Scratch.Get "inputClasses" }}"  required placeholder=" "  aria-labelledby="email"/>
    <div class="requirements f6 gray glow i ph3 overflow-hidden">
      {{ i18n "emailRequiredNote" }}
    </div>

    <label class="{{ $.Scratch.Get "labelClasses" }}" for="message">{{ i18n "message" }}</label>
    <textarea id="message" name="message" class="{{ $.Scratch.Get "inputClasses" }} h4" aria-labelledby="message"></textarea>

    <label class="{{ $.Scratch.Get "labelClasses" }}" for="resume">{{ i18n "test" }}</label>
    <input type="file" id="resume" name="file" class="{{ $.Scratch.Get "inputClasses" }}"  required placeholder=" "  aria-labelledby="resume"/>

    <input class="db w-100 mv2 white pa3 bn hover-shadow hover-bg-black bg-animate bg-black" type="submit" value="{{ i18n "send" }}" />

</form>
We will update the shortcode HTML file's name to getform-contact.html to use in our posts (markdown files).
Let's create a new contact.md file under the content directory and update its content as follows:
---
title: Contact
omit_header_text: true
description: We'd love to hear your applications
type: page
menu: main

---
This is an example of a custom shortcode that you can put right into your content. You will need to add a Getform endpoint to the shortcode to make it work. Check out [Getform](https://getform.io/) for a form backend service.

{{< getform-contact action="{your-endpoint-goes-here}"  >}}
Using the shortcode created, we are able to use it in our content files, to make it reusable, you will basically need to change your endpoint to the one you generate on Getform.
NOTE: Make sure to replace the value YOUR-FORM-ENDPOINT-GOES-HERE of the shortcode with the endpoint that you have generated in Step 2.
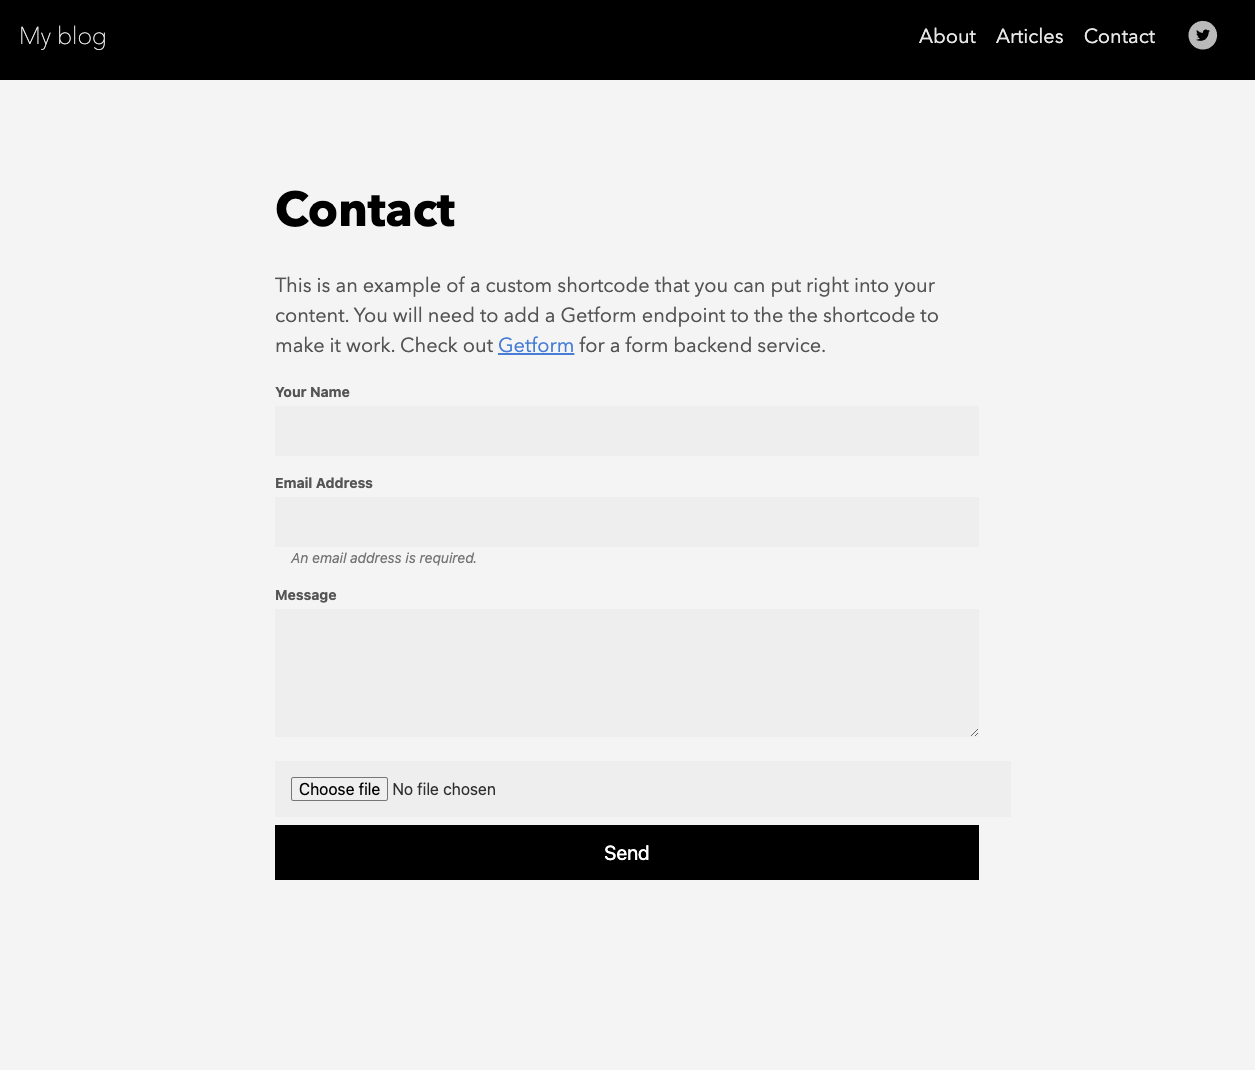
Here's how your file upload form should look at localhost:1313/contact if you have followed along:
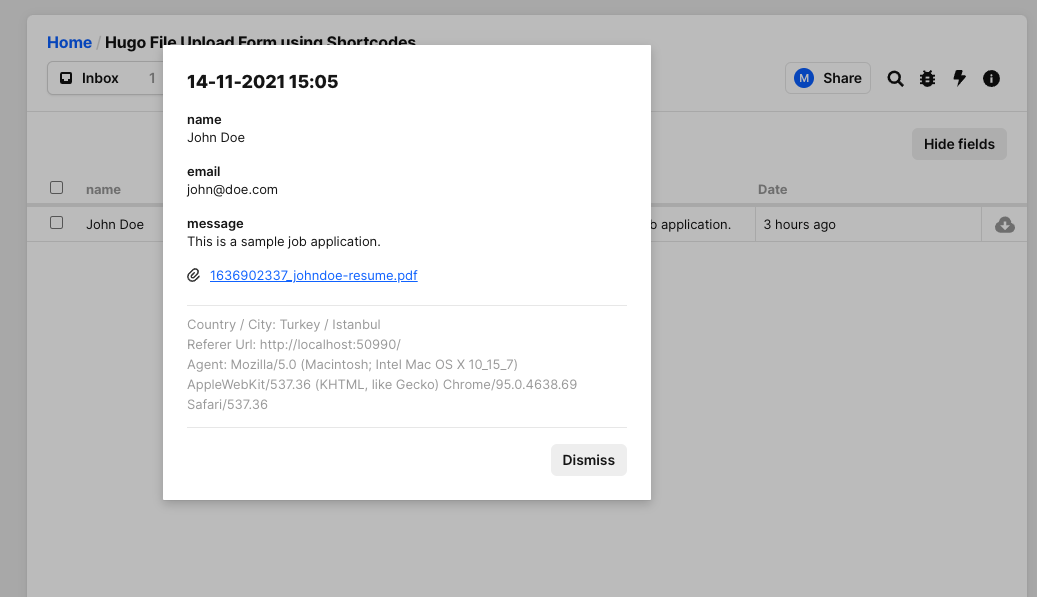
Step 4: Send HTML Form Submissions from your Hugo site
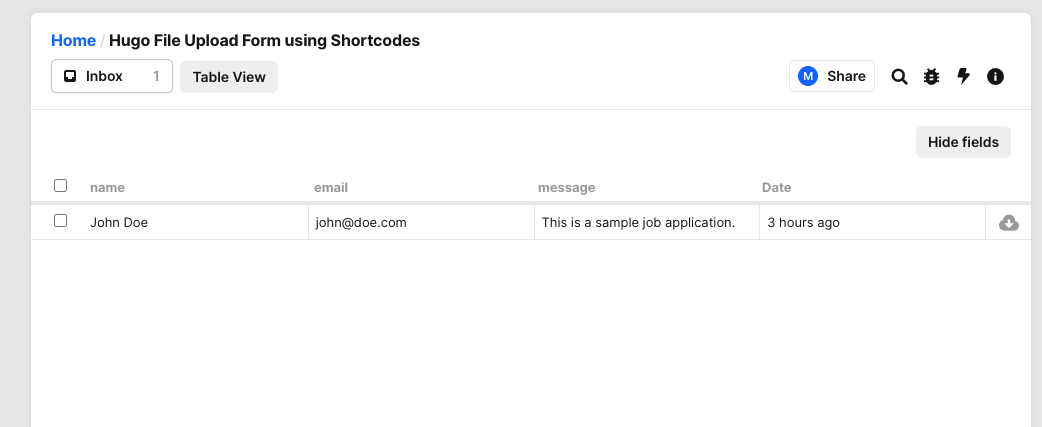
Once your form is filled out and submitted, HTML form submissions received from either your localhost or production environments will show up in your Getform endpoint dashboard.
Step 5: Deploy your Hugo site using Vercel
To deploy your Hugo + Getform app with Vercel for Git, make sure it has been pushed to a Git repository.
Import the project into Vercel using your Git provider of choice:
After your project has been imported, all subsequent pushes to branches will generate Preview Deployments, and all changes made to the Production Branch (commonly "main") will result in a Production Deployment.
Once deployed, you will get a URL to see your app live, such as the following:
Getform Automation
Getform allows you to setup Automation actions for custom redirections, Google reCAPTCHA integration, custom email templates, autoresponse emails and Zapier integration.
For example, using the Fill & Download Custom Redirection action, you can customize the default thank you page template with a file download option.
You can use the "Upload" option to upload files for your form submitters to download on the customized thank you pages after they submit to your form.
NOTE: You can find more information on Getform Automation actions in the Getform documentation and features section on Getform.io.
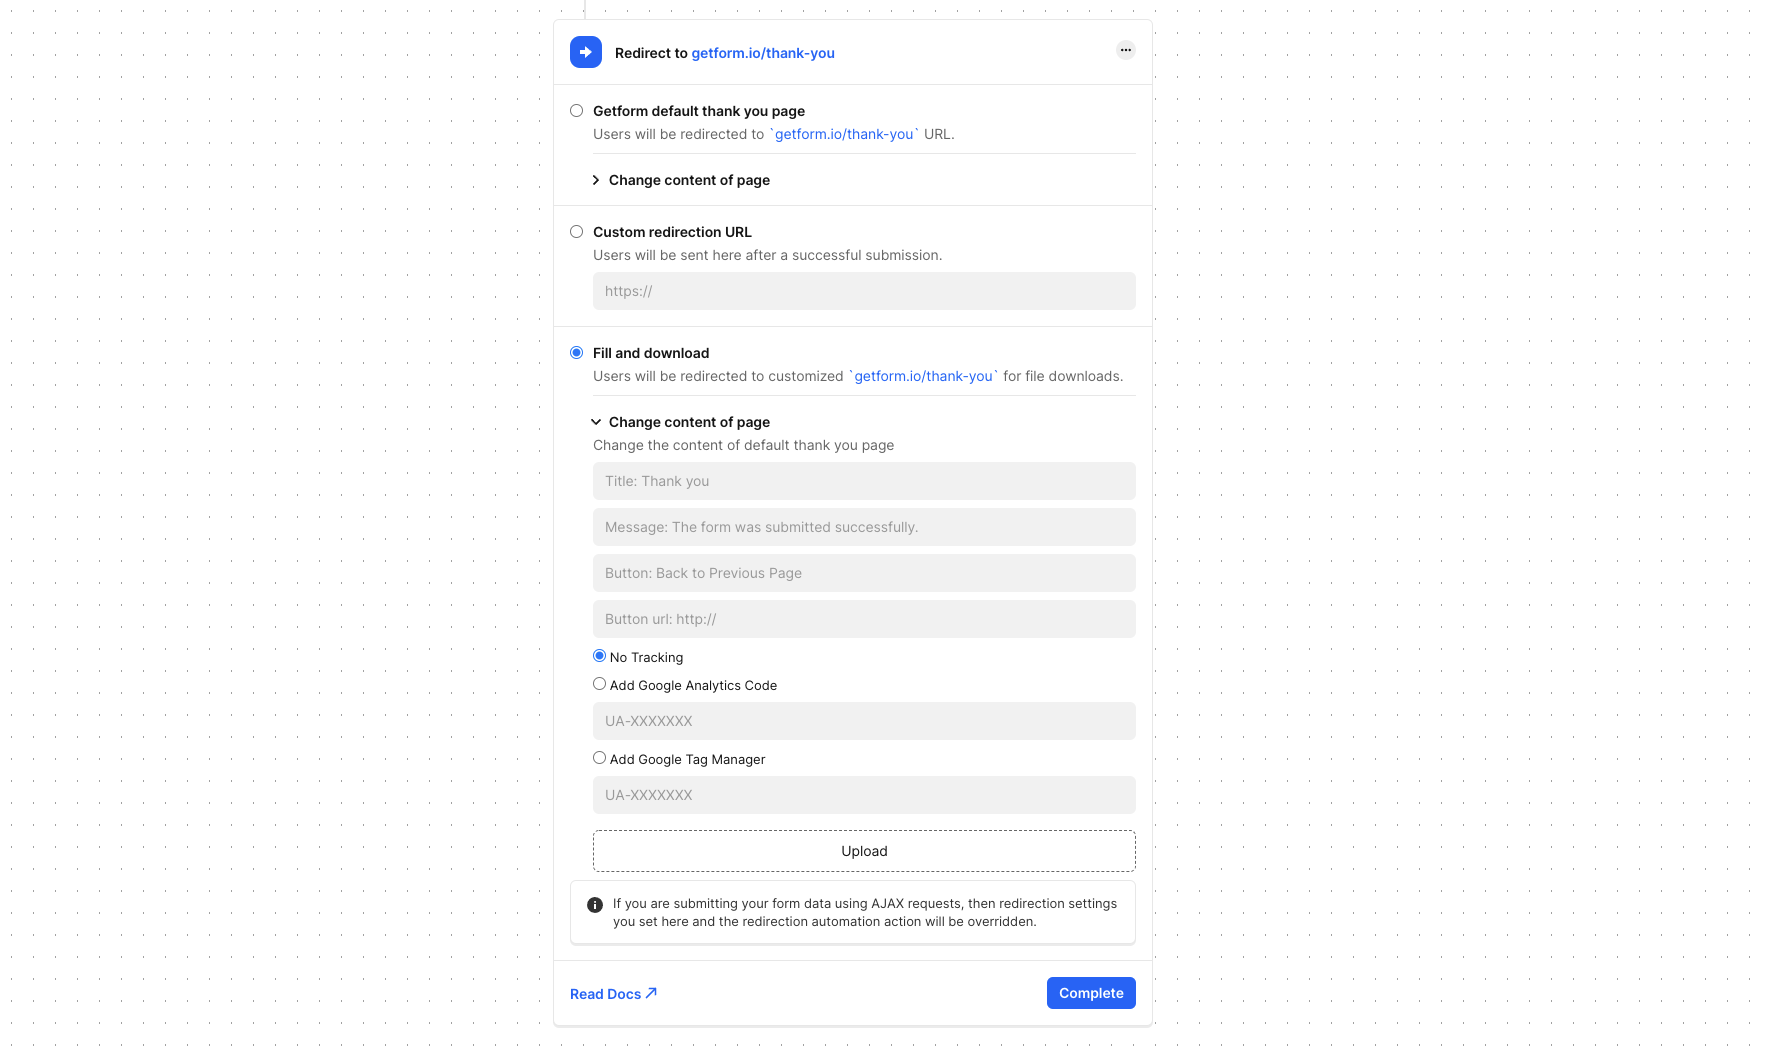
BONUS - Step 6: Setup Fill & Download Automation action for redirections
Our form endpoint is already receiving HTML form submissions which can be viewed on Getform's dashboard. Let's customize the content of the Getform's default thank you page and upload a file
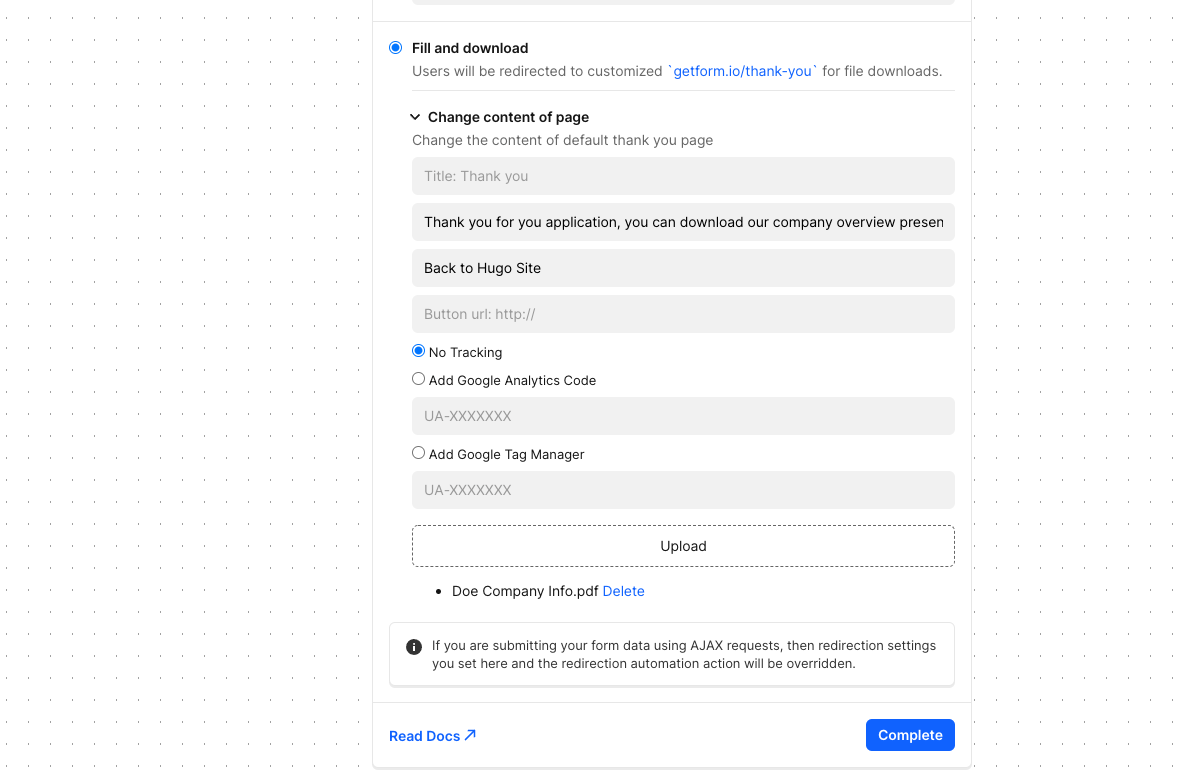
Head over to the "Automation" section and select the "Redirect to getform.io/thank-you" automation action. Customize the fields and upload the file you wish to be downloaded by your visitors after a successful submission, then click "Complete" on the action section and click "Save" from the top right of the page to complete the automation action setup.
Once your HTML form is submitted, here's how your customized thank you page with downloadable file looks like:
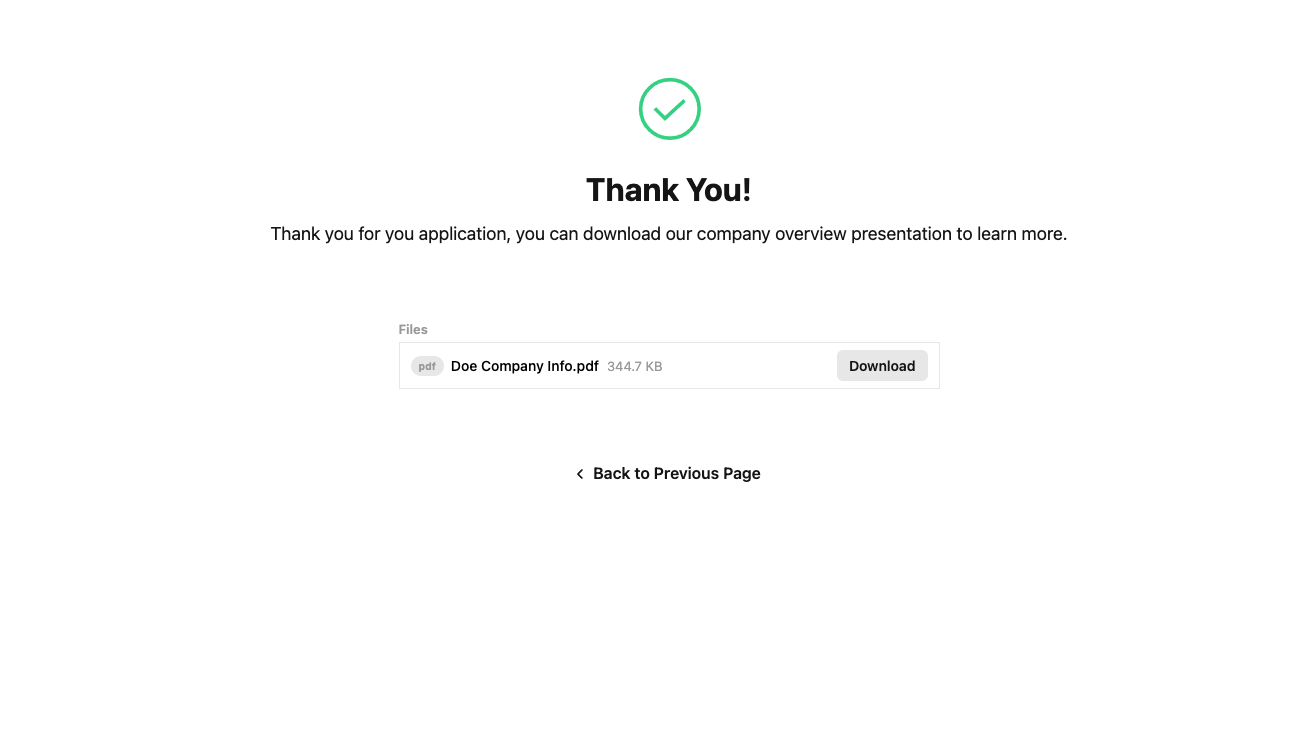
That's it! Your Hugo site with file upload form setup is ready and you can now let your customers to download a specific file after they submit the form on your Hugo site or blog.
Thank you for reading! We keep enhancing Getform by listening to you, share your feedback and ideas at https://getform.nolt.io or vote on the existing ones.
Check out our Codepen page, Codesandbox page, Zapier page and Documentation for more information and guides.
If you would like help setting up Getform to Hugo site, feel free to reach us out at info@getform.io