
Forms are an essential part of the web. When you design a fast, static website using a static site generation framework like Gatsby — a landing page for your product or your company, for example— you will want to add a form. This generally requires some backend logic, which requires time and effort to implement. But you don’t necessarily have to go down to that road.
GatsbyJS is a React-based progressive static-site generation framework that uses GraphQL to store and access content from any data source and includes static site generation. It takes the good parts of React, webpack, react-router and GraphQL and helps developers build blazing-fast websites and apps.
Getform is a form backend platform built for developers and designers that handles form submissions on static sites and sends submissions via email.
Getform also provides enhanced spam protection, form automation that includes fill & download forms, automatic responses, custom notifications and connection to 3rd party services such as Google Sheets, Slack, Trello and more.
In this guide, you will discover how to create a file upload form on a Gatsby project, handle HTML form submissions using Getform and deploy it with Vercel.
Before getting started, sign up for a free Vercel and Getform account.
Step 1: Create a Gatsby.js app
Install `Gatsby CLI from your terminal:
$ npm install -g gatsby-cliAnd create a new Gatsby app:
$ npm install -g gatsby-cliAdd the axios dependency to your project:
$ npm install axiosChange directories into site folder
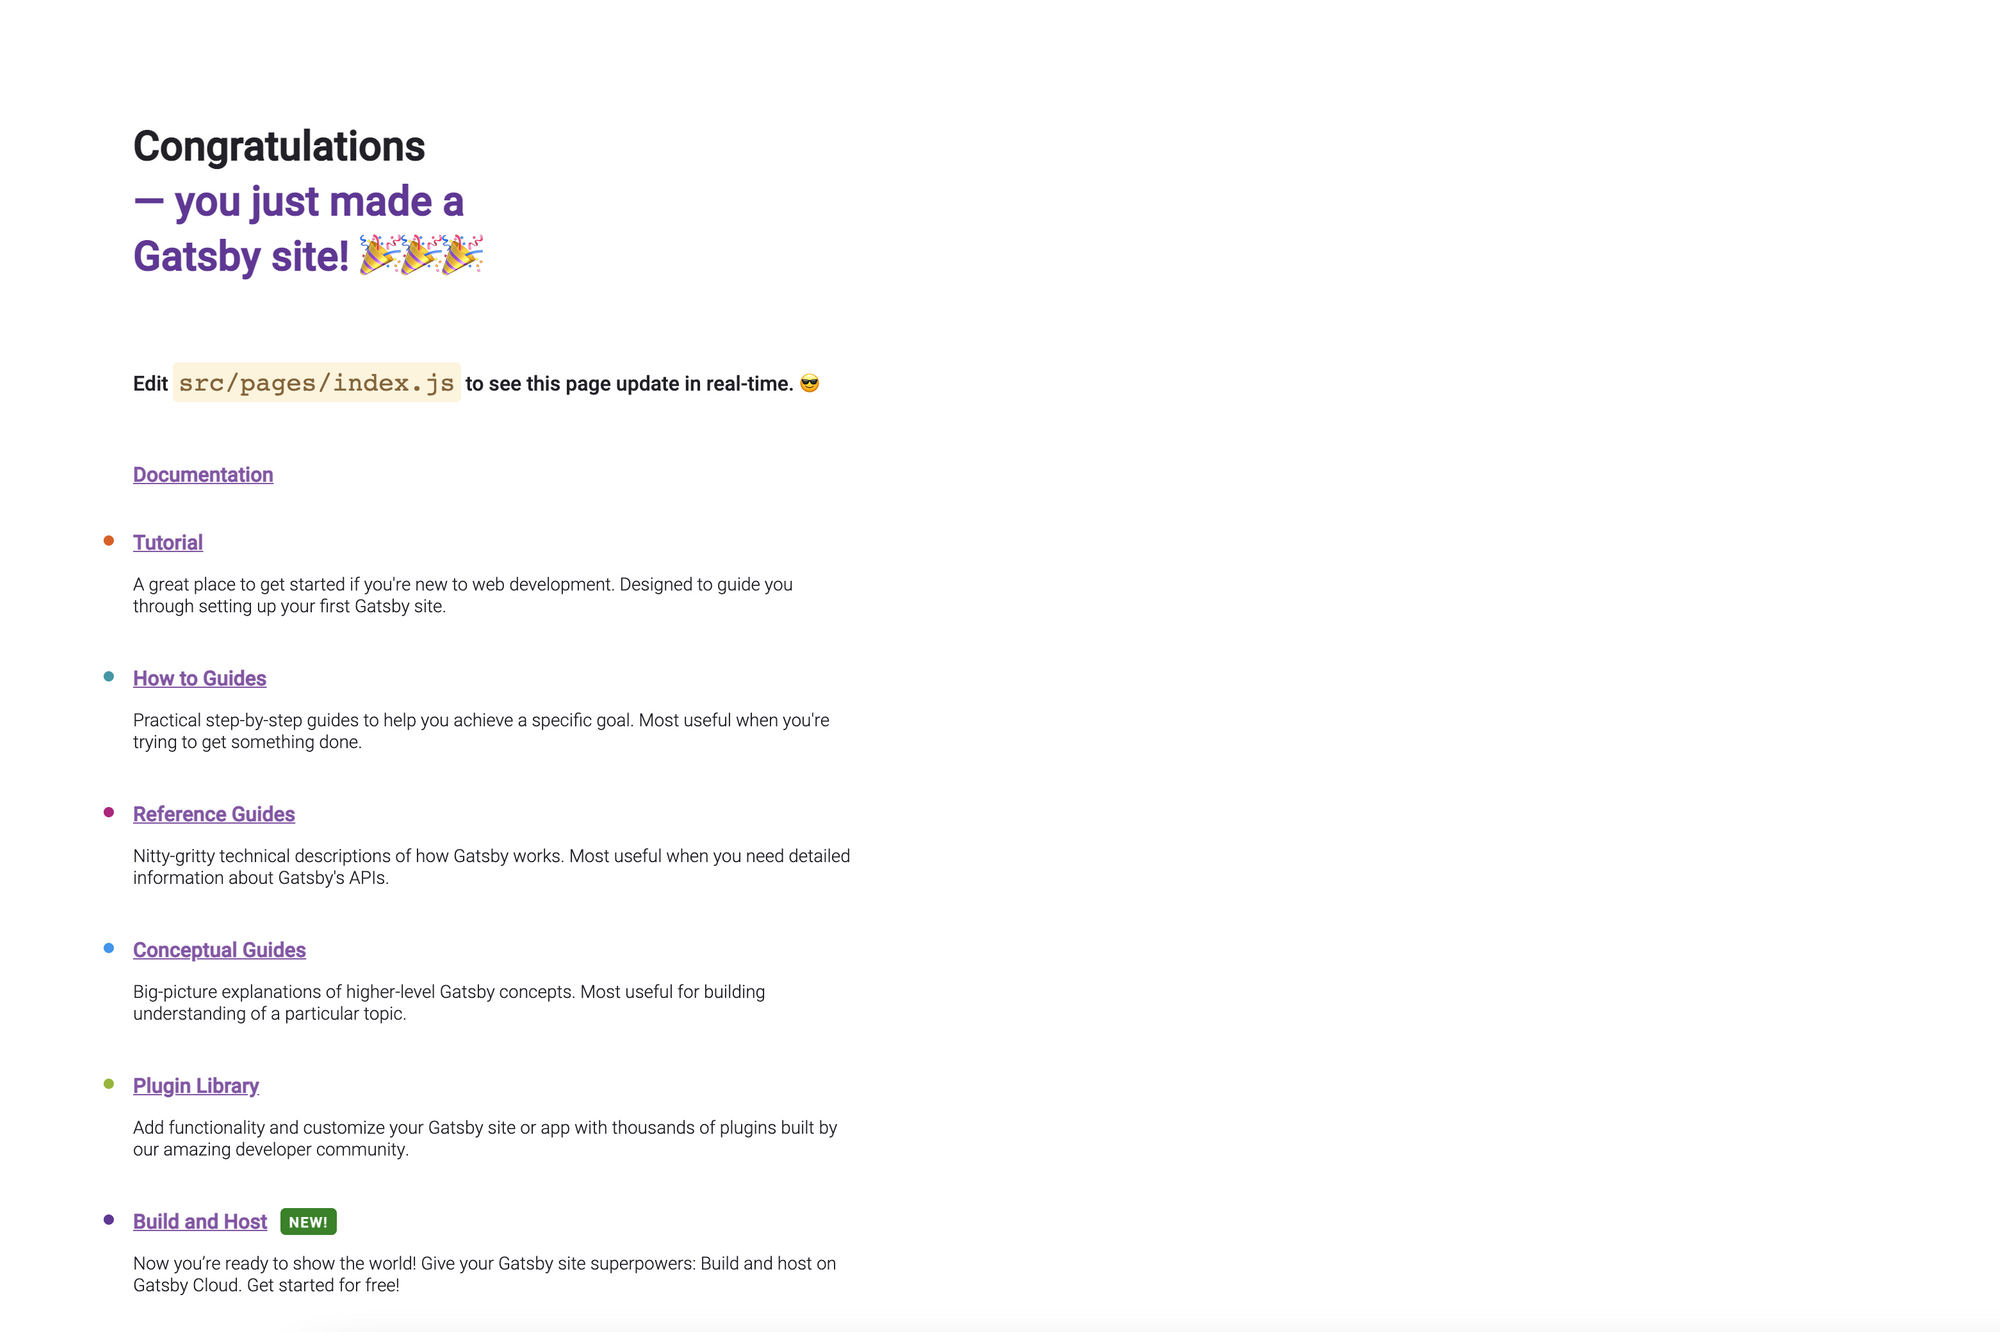
$ gatsby develop
Gatsby will start a hot-reloading development environment accessible by default at localhost:8000 which will look like as follows:
Step 2: Create your form endpoint on Getform.io
Visit your Getform Dashboard and create a new form endpoint. Getform will ask you to name your form endpoint and the timezone of the endpoint.

With your form endpoint created, you can then copy the form's endpoint from the endpoint overview page. This will be used in your project as a place to submit your form data.

Step 3: Create your form component on your Gatsby project
Create a ContactForm.js file in the /src/pages directory with the code below:
import axios from 'axios';
import React, { useState } from "react"
import 'bootstrap/dist/css/bootstrap.min.css';
const GETFORM_FORM_ENDPOINT = "YOUR-FORM-ENDPOINT";
function Form() {
const [formStatus, setFormStatus] = useState(false);
const [query, setQuery] = useState({
name: "",
email: "",
});
const handleFileChange = () => (e) => {
setQuery((prevState) => ({
...prevState,
files: e.target.files[0]
}));
};
const handleChange = () => (e) => {
const name = e.target.name;
const value = e.target.value;
setQuery((prevState) => ({
...prevState,
[name]: value
}));
};
const handleSubmit = (e) => {
e.preventDefault();
const formData = new FormData();
Object.entries(query).forEach(([key, value]) => {
formData.append(key, value);
});
axios
.post(
GETFORM_FORM_ENDPOINT,
formData,
{headers: {Accept: "application/json"}}
)
.then(function (response) {
setFormStatus(true);
setQuery({
name: "",
email: "",
});
console.log(response);
})
.catch(function (error) {
console.log(error);
});
};
return (
<div class="container-md">
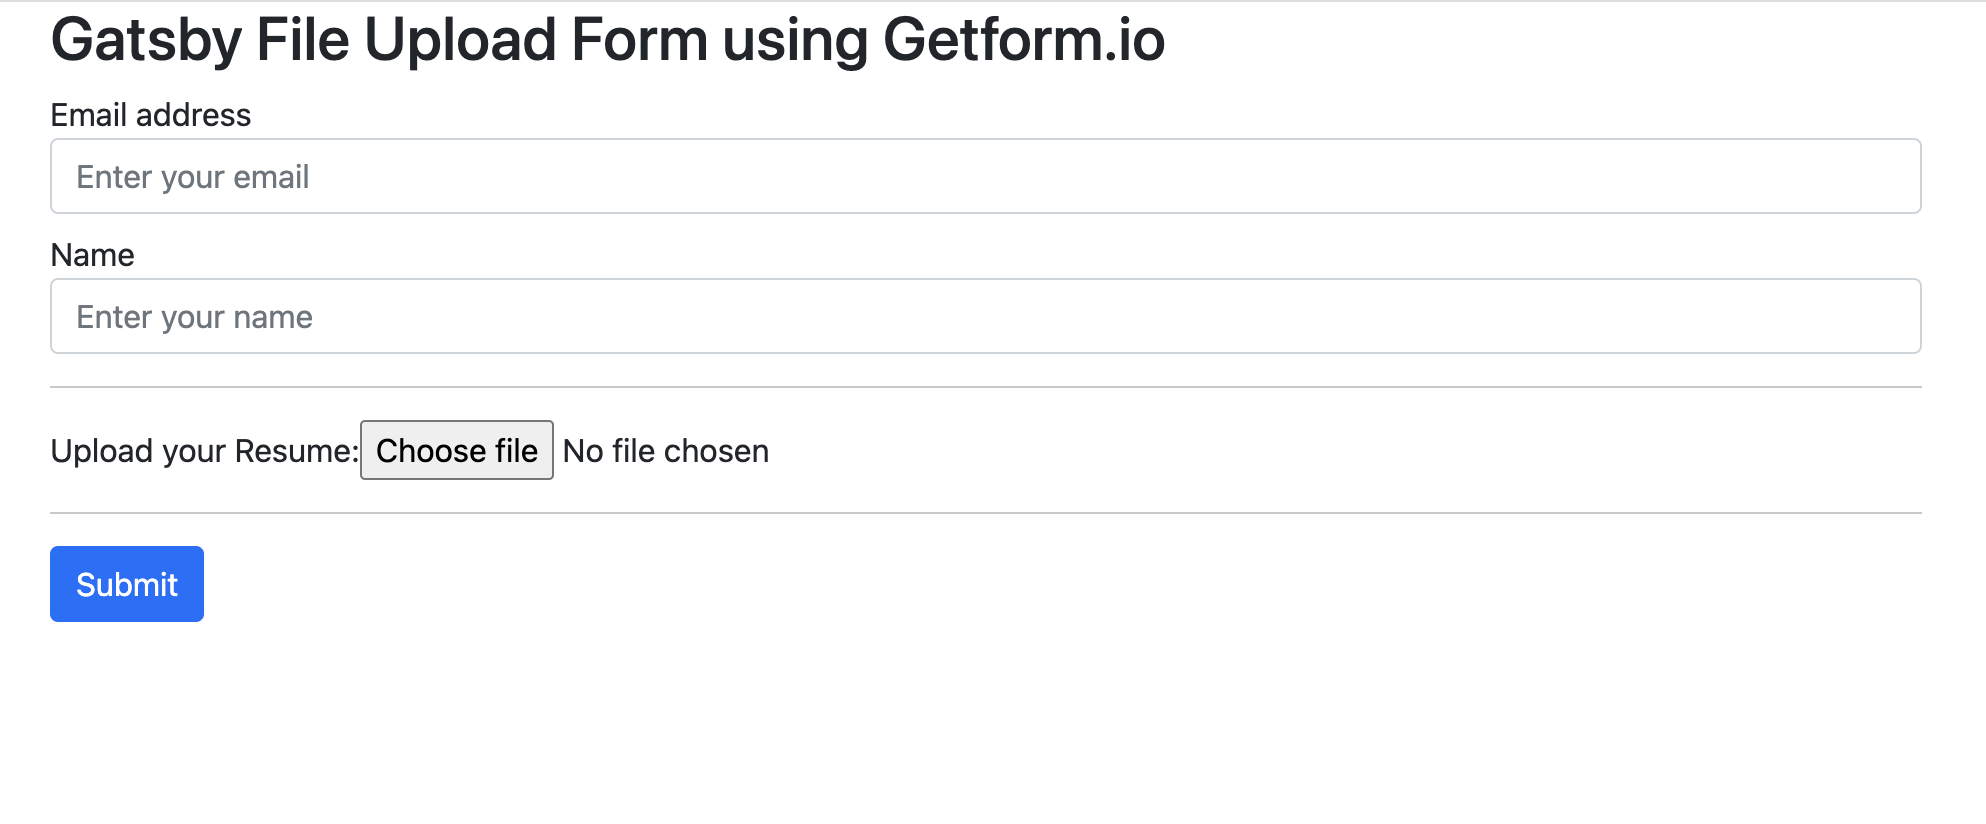
<h2>Gatsby File Upload Form using Getform.io</h2>
<form
acceptCharset="UTF-8"
method="POST"
enctype="multipart/form-data"
id="gatsbyForm"
onSubmit={handleSubmit}
>
<div className="form-group mb-2">
<label for="exampleInputEmail1">Email address</label>
<input
type="email"
className="form-control"
placeholder="Enter your email"
required
name="email"
value={query.email}
onChange={handleChange()}
/>
</div>
<div className="form-group mb-2">
<label for="exampleInputName">Name</label>
<input
type="text"
className="form-control"
placeholder="Enter your name"
required
name="name"
value={query.name}
onChange={handleChange()}
/>
</div>
<hr/>
<div className="form-group mt-3">
<label className="mr-2">Upload your Resume:</label>
<input name="file" type="file" onChange={handleFileChange()}/>
</div>
<hr/>
{formStatus ? (
<div className="text-success mb-2">
Your message has been sent.
</div>
) : (
""
)}
<button type="submit" className="btn btn-primary">Submit</button>
</form>
</div>
);
}
export default Form
NOTE: Make sure to replace the value YOUR-FORM-ENDPOINT of the const GETFORM_FORM_ENDPOINT with the endpoint that you have copied in Step 2.
- We pass the full form data as an object to Axios. Axios will convert this into a
multipart/form-dataobject before submitting and Getform understands this payload. - We enable bootstrap by installing it using package managers, npm or yarn:
— with npm - npm install react-bootstrap bootstrap
— with yarn - yarn add react-bootstrap bootstrap
and import it to your contact page usingimport 'bootstrap/dist/css/bootstrap.min.css';
You are now ready to deploy your project live and start receiving form submissions.
Here's how your file upload form should look at localhost:8000/contact if you have followed along:
Step 4: Send HTML Form Submission from your Gatsby site
Once your form is filled out and submitted, HTML form submissions received from either your localhost or production environments will show up in your Getform endpoint dashboard in either Smart View or Table View options.
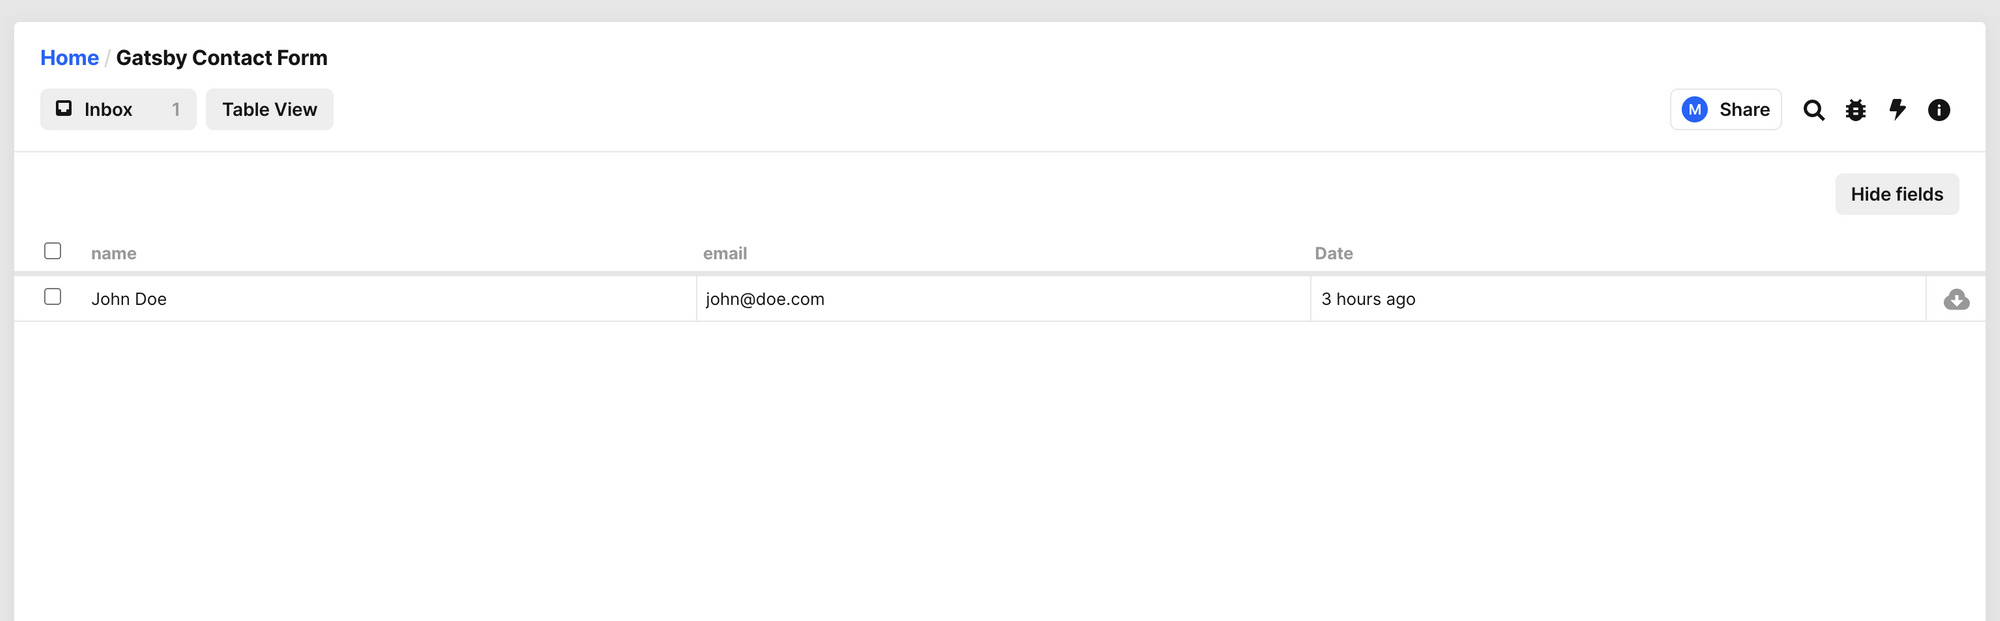
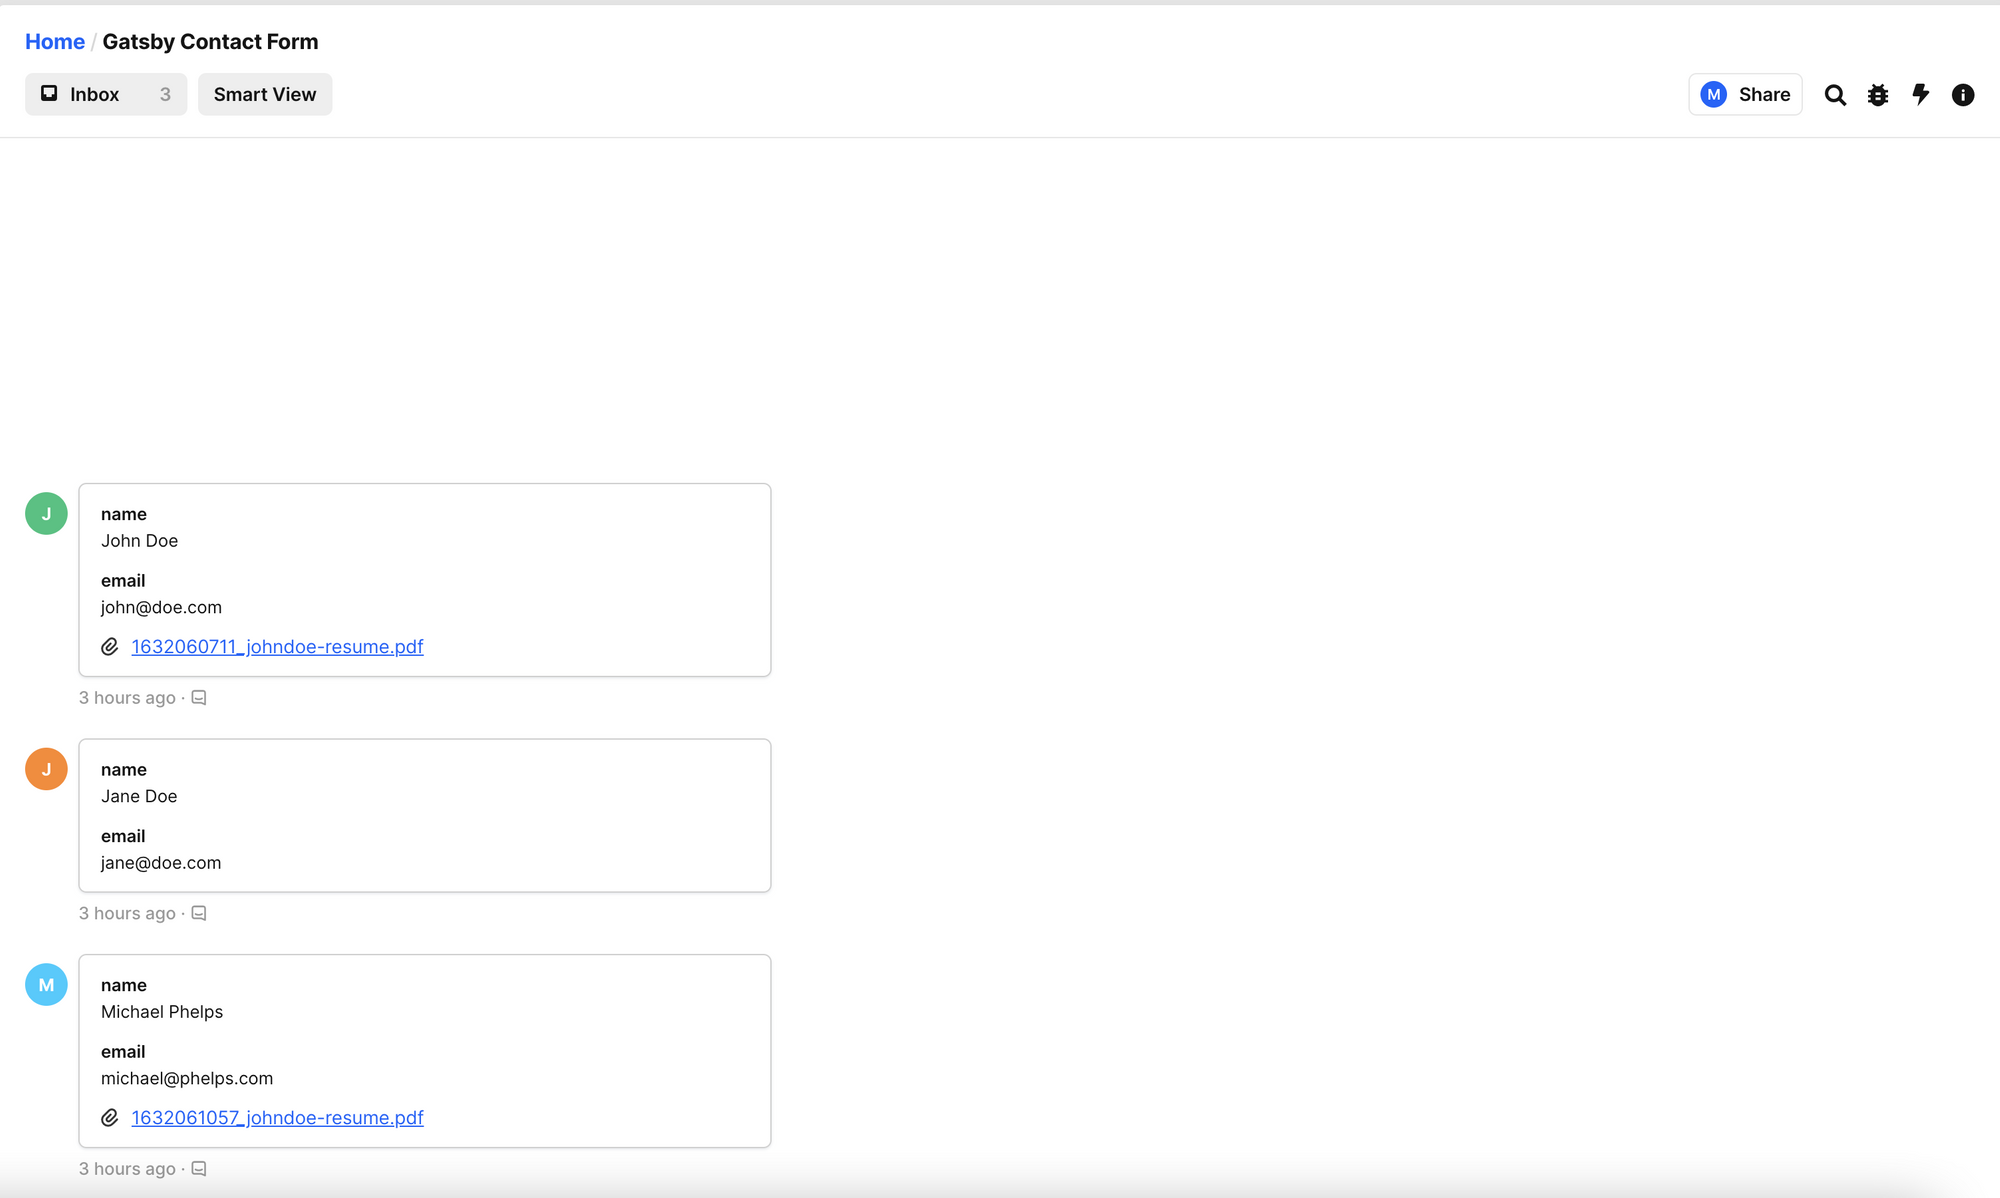
You can simply view the uploaded files on both of the view options.
Step 5: Deploy your Gatsby site using Vercel
To deploy your Gatsby + Getform app with Vercel for Git, make sure it has been pushed to a Git repository.
Import the project into Vercel using your Git provider of choice:
After your project has been imported, all subsequent pushes to branches will generate Preview Deployments, and all changes made to the Production Branch (commonly "main") will result in a Production Deployment.
Once deployed, you will get a URL to see your app live, such as the following: https://gatsby-vercel-getform.vercel.app/contact/
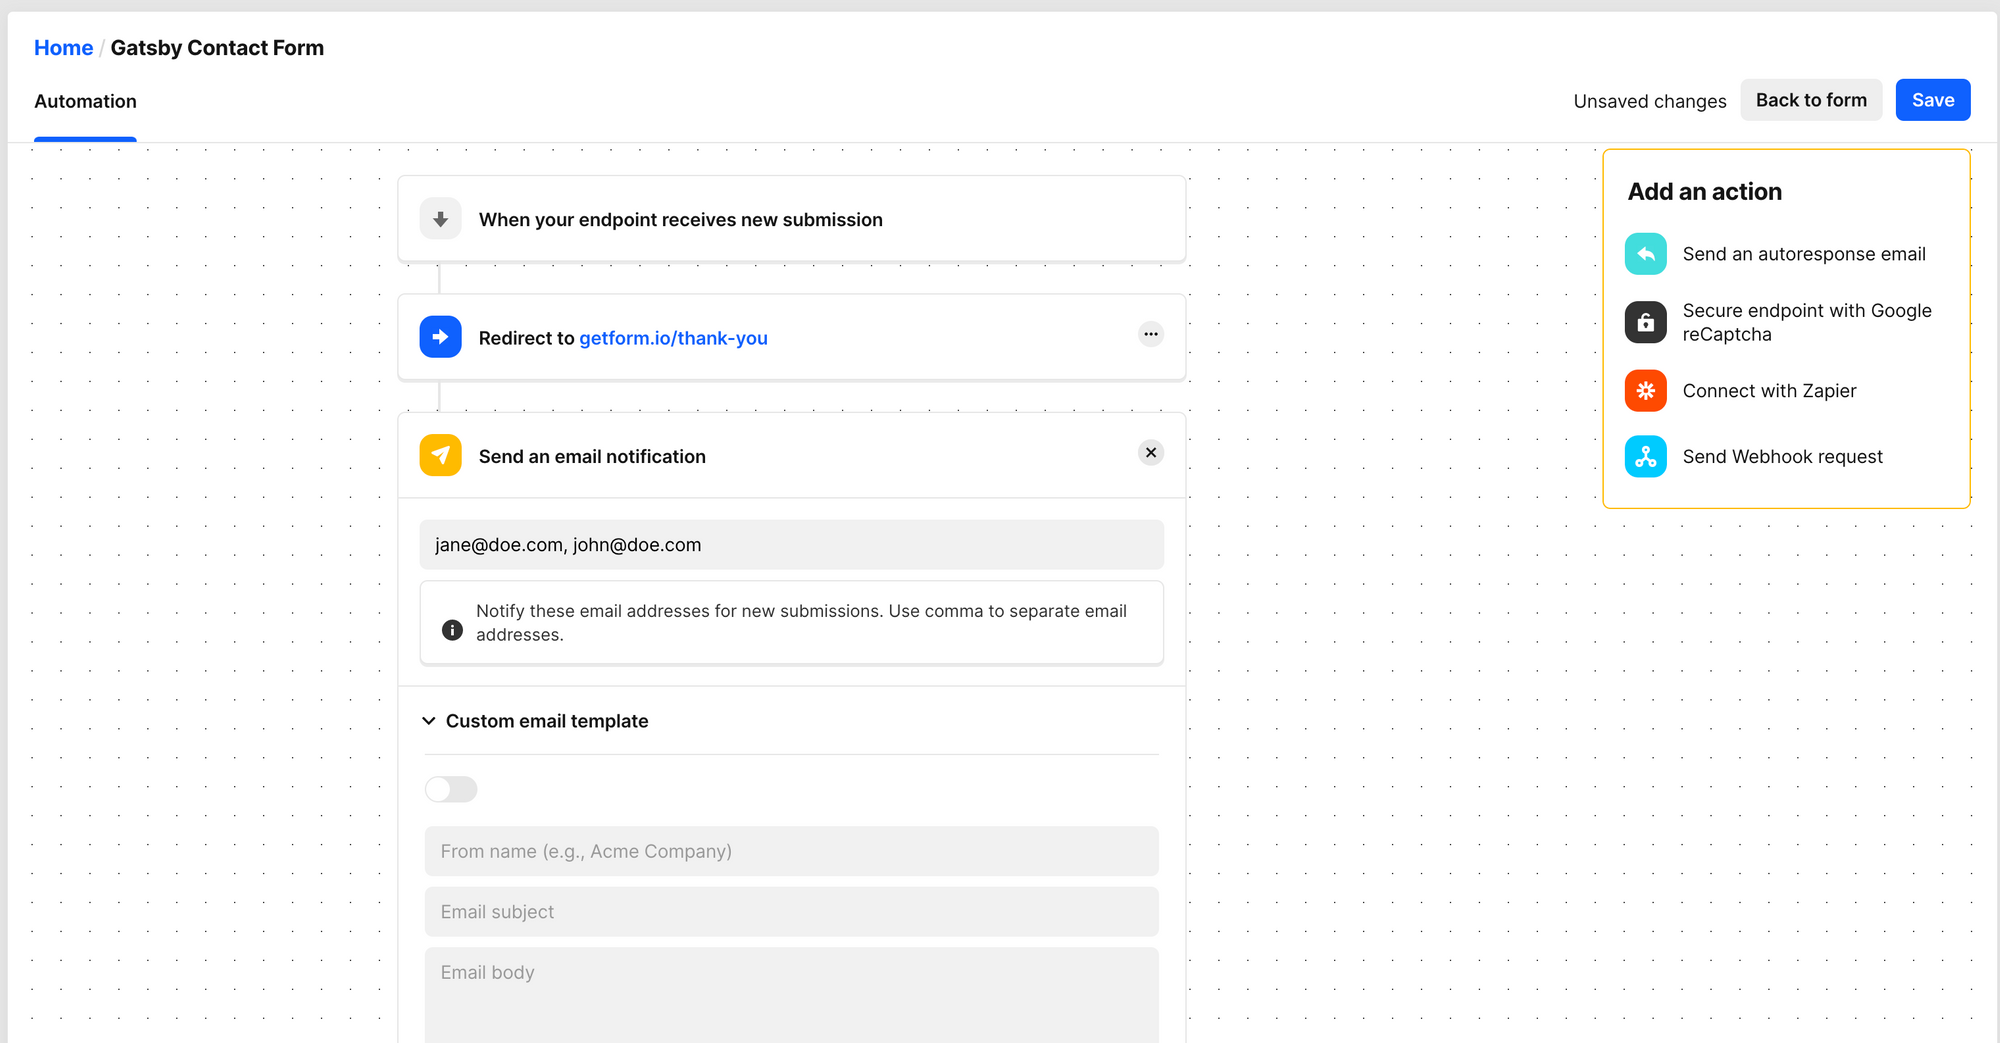
Getform Automation
Getform allows you to setup Automation actions for custom redirections, Google reCAPTCHA integration, custom email templates, autoresponse emails and Zapier integration.
For example, using Custom email template action, you can use your own HTML for the email body and customize the From Name and Email Subject.

NOTE: You can find more information on Getform Automation actions in the Getform documentation and features section on Getform.io.
BONUS - Step 5: Setup an email notification Automation action
Our form endpoint is already receiving HTML form submissions which can be viewed on Getform's dashboard. Let's setup an email notification action to receive notification emails every time our Gatsby file upload form is submitted.
Head over to the "Automation" section and select the "Send an email notification" action from the right-hand action menu. Add the email addresses to notify for every new submission, then click "Complete" on the action section and click "Save" from the top right of the page to complete the automation action setup.
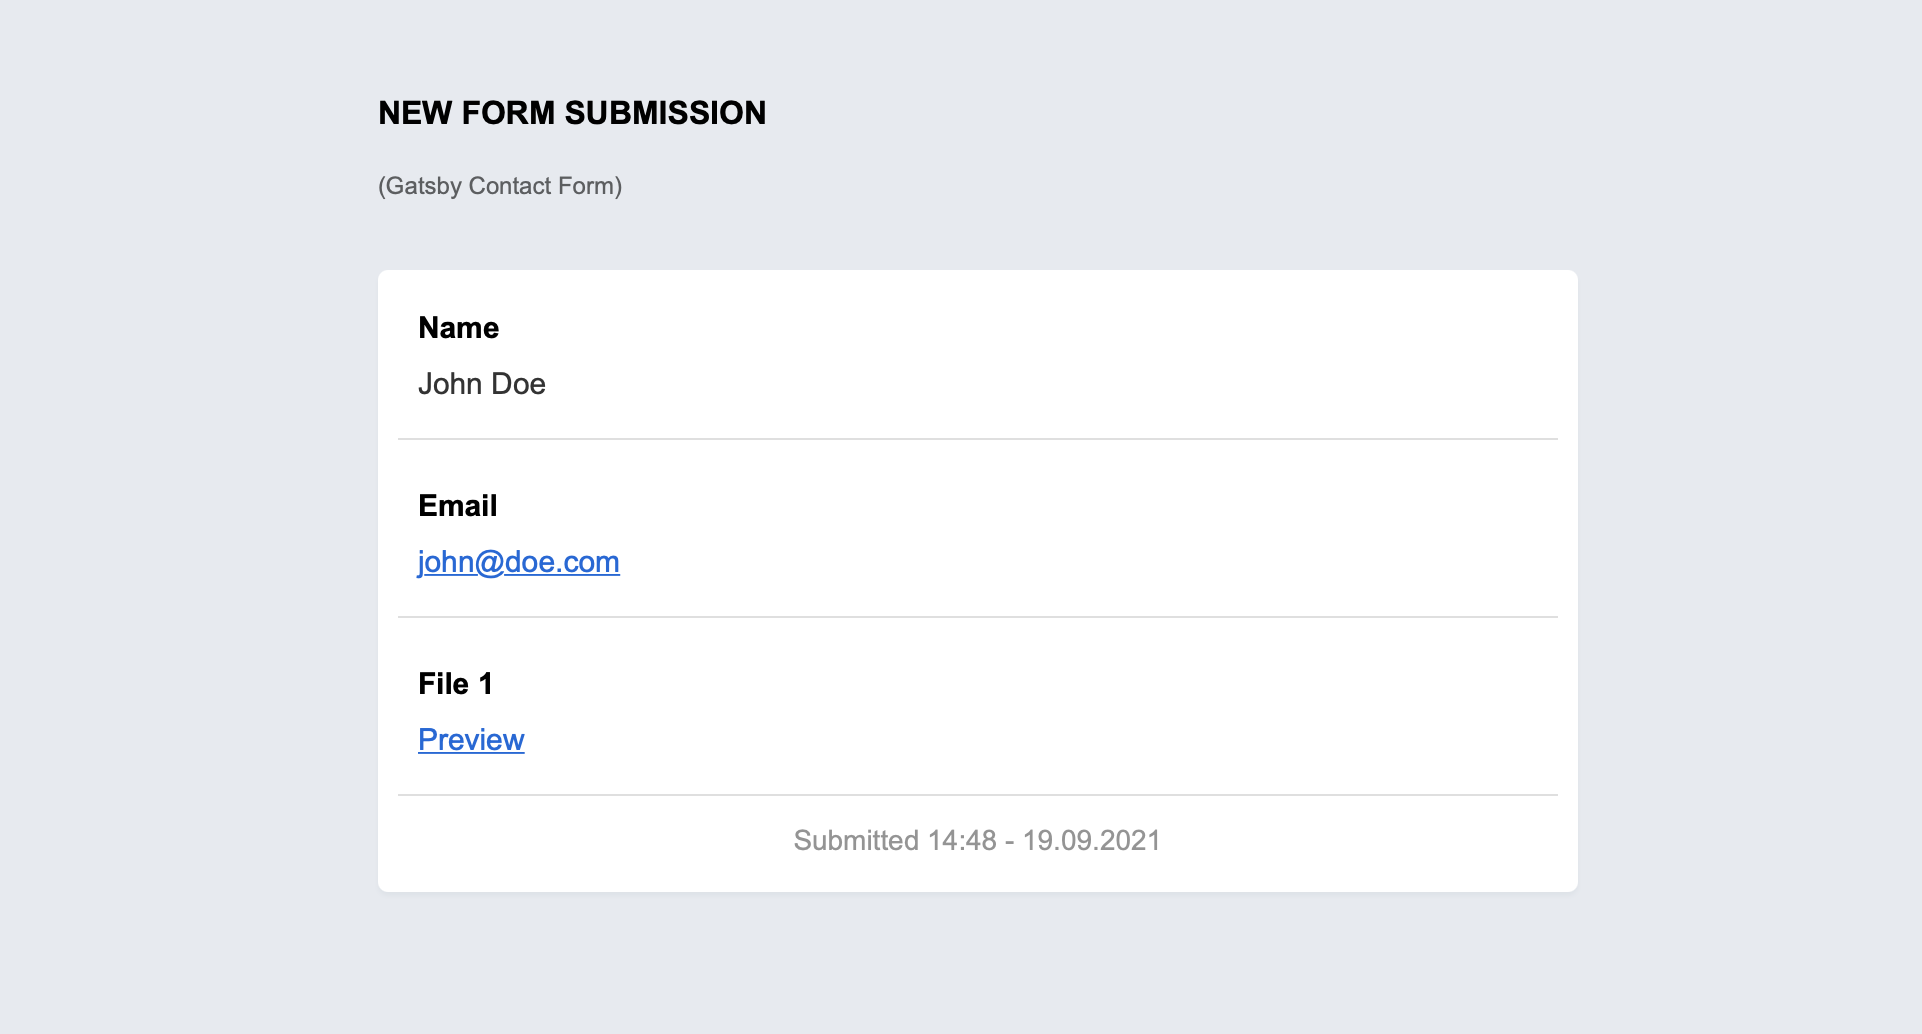
Once your HTML form is submitted, here's how the email notification looks like for the new submission:
Thank you for reading! We keep enhancing Getform by listening to you, share your feedback and ideas at https://getform.nolt.io or vote on the existing ones.
Check out our Codepen page, Codesandbox page, Zapier page and Documentation for more information and guides.
If you would like help setting up Getform to Gatsby site, feel free to reach us out at info@getform.io