
Surreal CMS is a simple, yet powerful, hosted Content Management System, which lets you set pre-defined areas on web pages that can later be edited after the page has been published. SurrealCMS gives you an easy to use interface and you still keep the direct control over your source code and the layout of your website.
Getform is the leading form backend platform that allows you to collect leads, taking surveys or receiving job applications without having to manage form backend yourself. In this blog post, we will cover how to setup a contact form to your SurrealCMS enabled website using Getform.
Setup a contact form on Surreal CMS
- First, let's sign in to your Getform account here: https://getform.io/login and go to your form dashboard.
- Click "+" button to create a new form which you will use to handle your Surreal CMS contact form. Let's name it as "Surreal Contact Form" and save.
- With that form created, your unique form endpoint is now ready to be inserted to your HTML form.
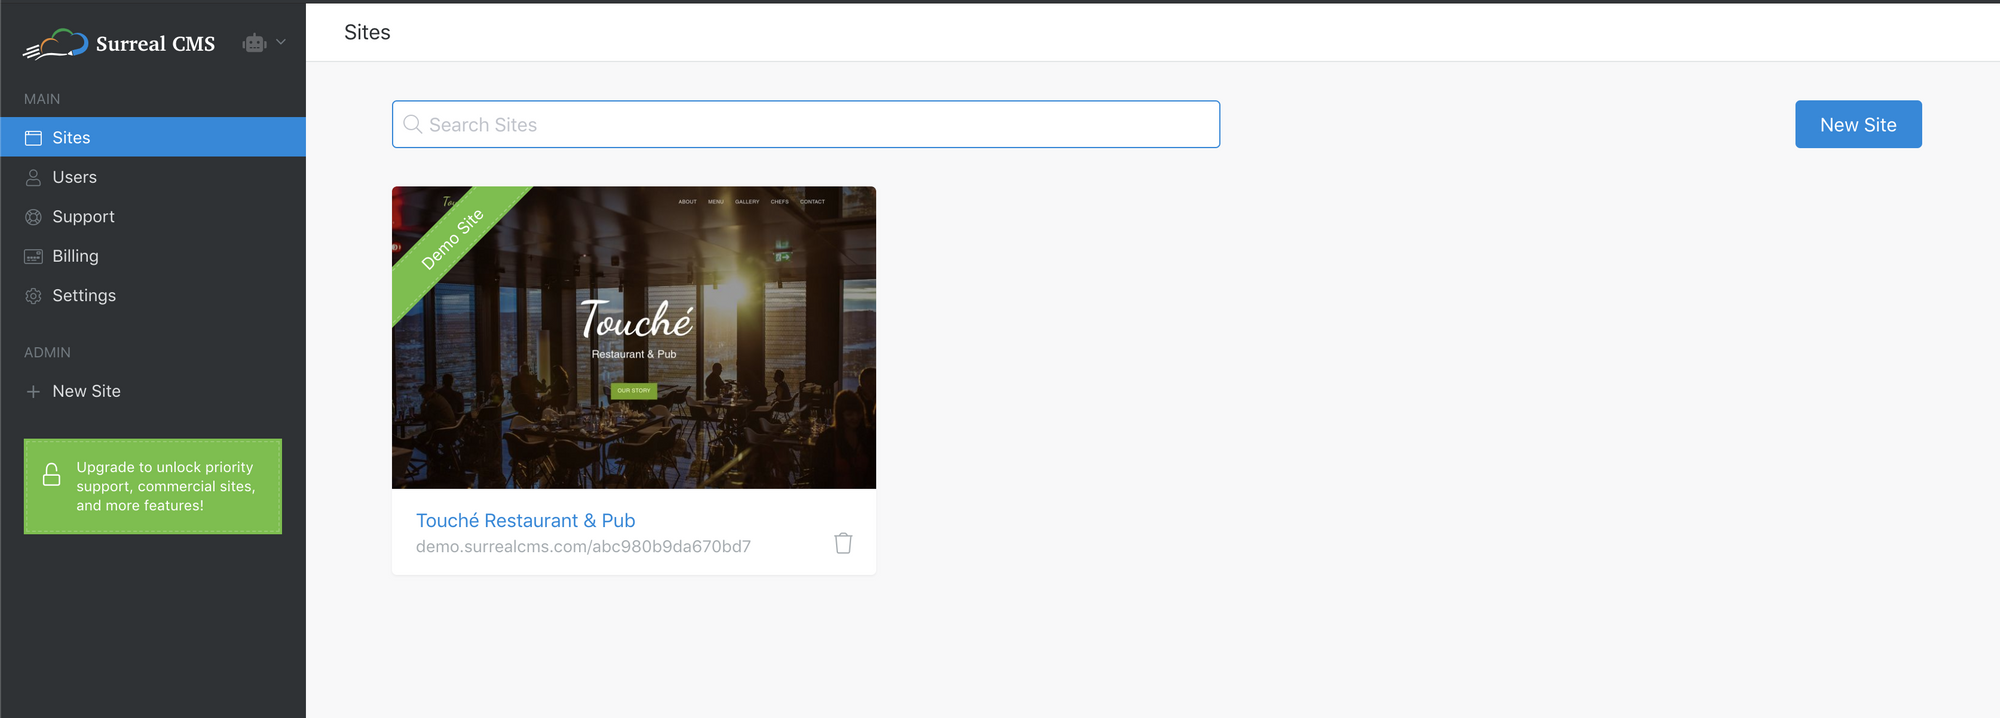
4. Go to your Surreal CMS dashboard where you will see the list of websites you're managing with Surreal CMS. If you're new to Surreal CMS, you can continue with the demo site (pictured below) as we will be doing throughout this tutorial.
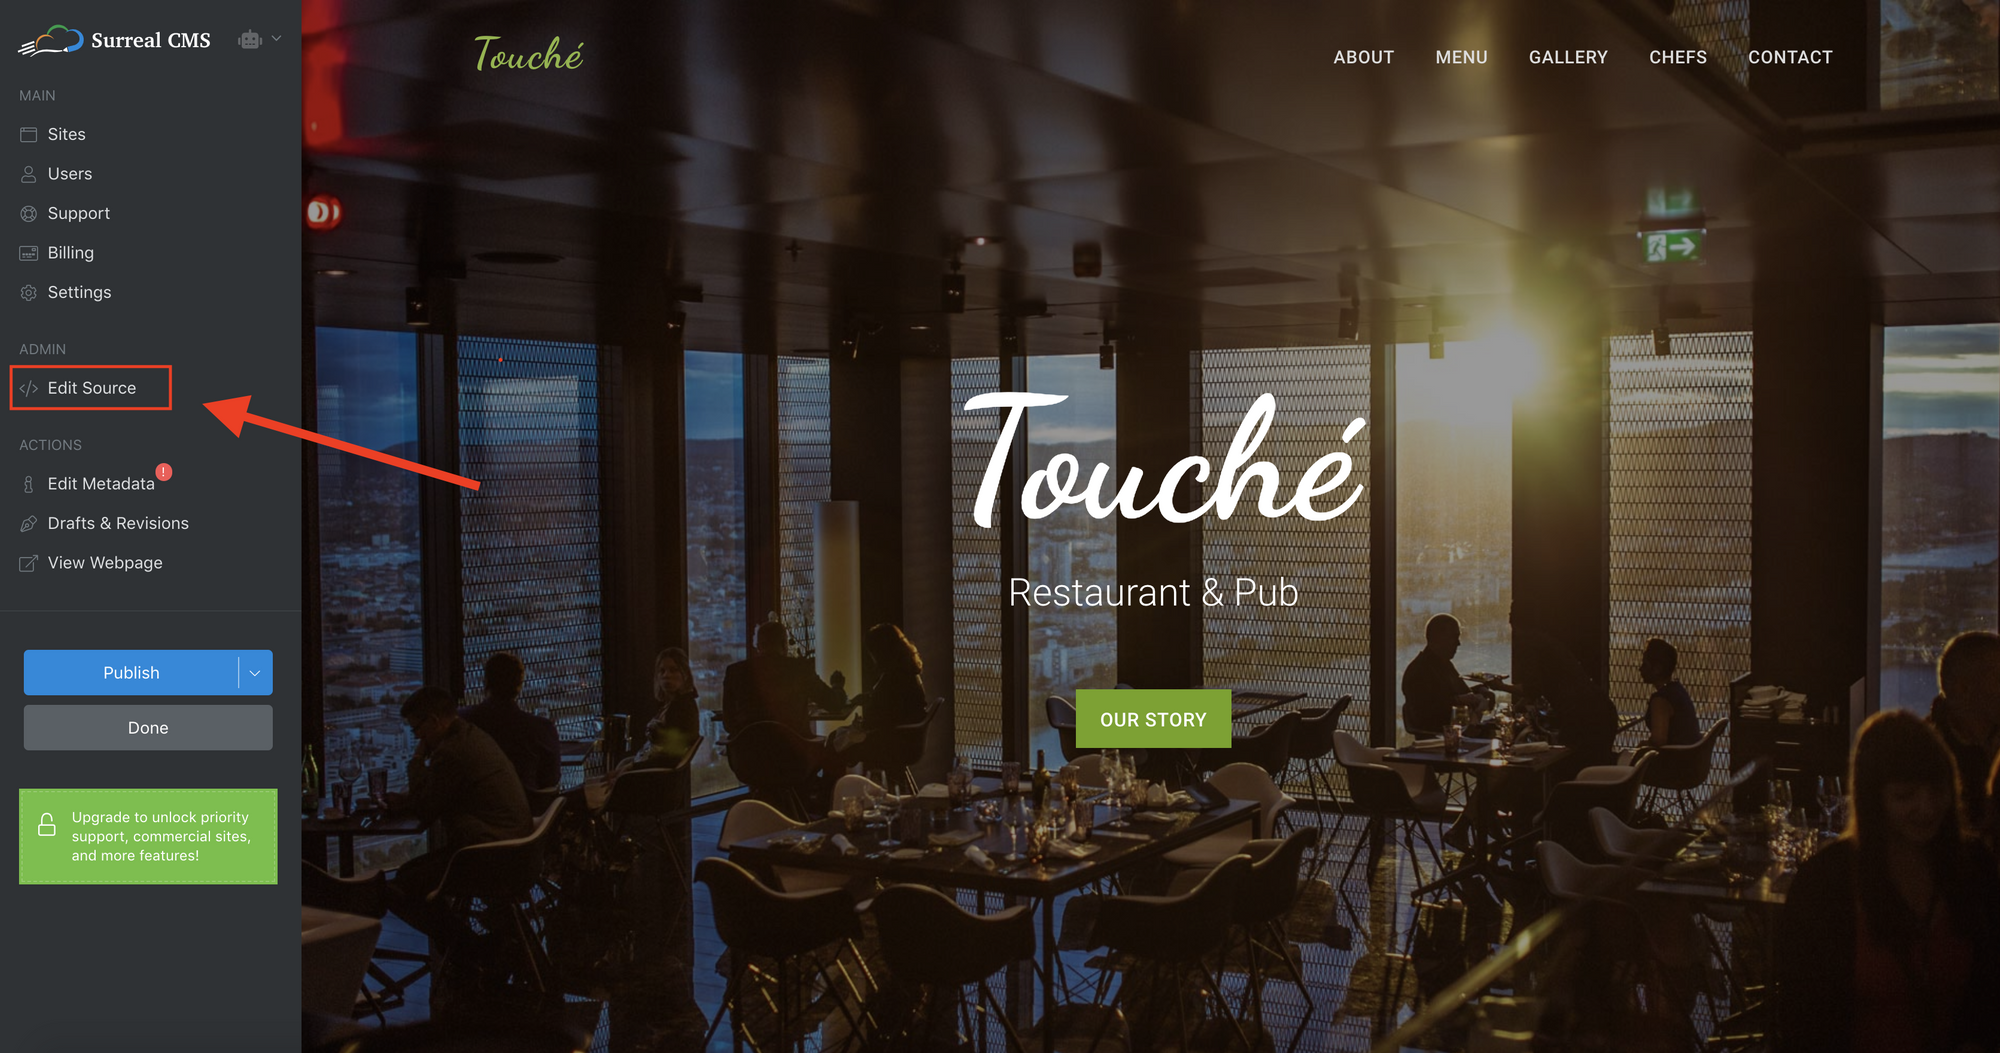
5. Click on the demo site and head over to its index.html where you will make the changes to point your form's backend to Getform. Click to "Edit Source" option to see the source code of the Surreal CMS demo site.
6. Find the Contact section to edit and replace it with the code below. Don't forget to replace the action field with your unique form endpoint that you obtained at Step 3.
<!-- Contact Section -->
<div class="text-center">
<div class="container cms-include" id="contact-form-getform">
<div class="section-title text-center cms-editable">
<h2>Contact Us</h2>
<hr>
<p>Have a question or want to suggest a new item for our menu? Let us know!</p>
</div>
<div class="col-md-10 col-md-offset-1">
<form action="https://getform.io/f/{your-getform-endpoint}" method="POST" accept-charset="UTF-8" enctype="multipart/form-data">
<div class="row">
<div class="col-md-6">
<div class="form-group">
<input type="text" name="name" class="form-control" placeholder="Name" required="required">
</div>
</div>
<div class="col-md-6">
<div class="form-group">
<input type="email" name="email" class="form-control" placeholder="Email" required="required">
</div>
</div>
</div>
<div class="form-group">
<textarea name="message" class="form-control" rows="4" placeholder="Message" required></textarea>
</div>
<div class="row">
<div class="col-md-6">
<div class="form-group">
<label for="menu-item-category" id="menu-item-category-label" cms-editable>Select a Menu Item Category</label>
<select class="form-control" id="menu-item-category" name="platform" required="required">
<option>Breakfast & Starters</option>
<option>Main Course</option>
<option>Dinner</option>
<option>Coffee & Drink</option>
</select>
</div>
</div>
<div class="col-md-6">
<div class="form-group">
<label for="food-photo" id="food-photo-label" class="cms-editable">Upload a photo of your suggestion</label>
<input type="file" name="photo" id="food-photo" class="form-control" required>
</div>
</div>
</div>
<button type="submit" class="btn btn-custom btn-lg">Send Message</button>
</form>
</div>
</div>
</div>
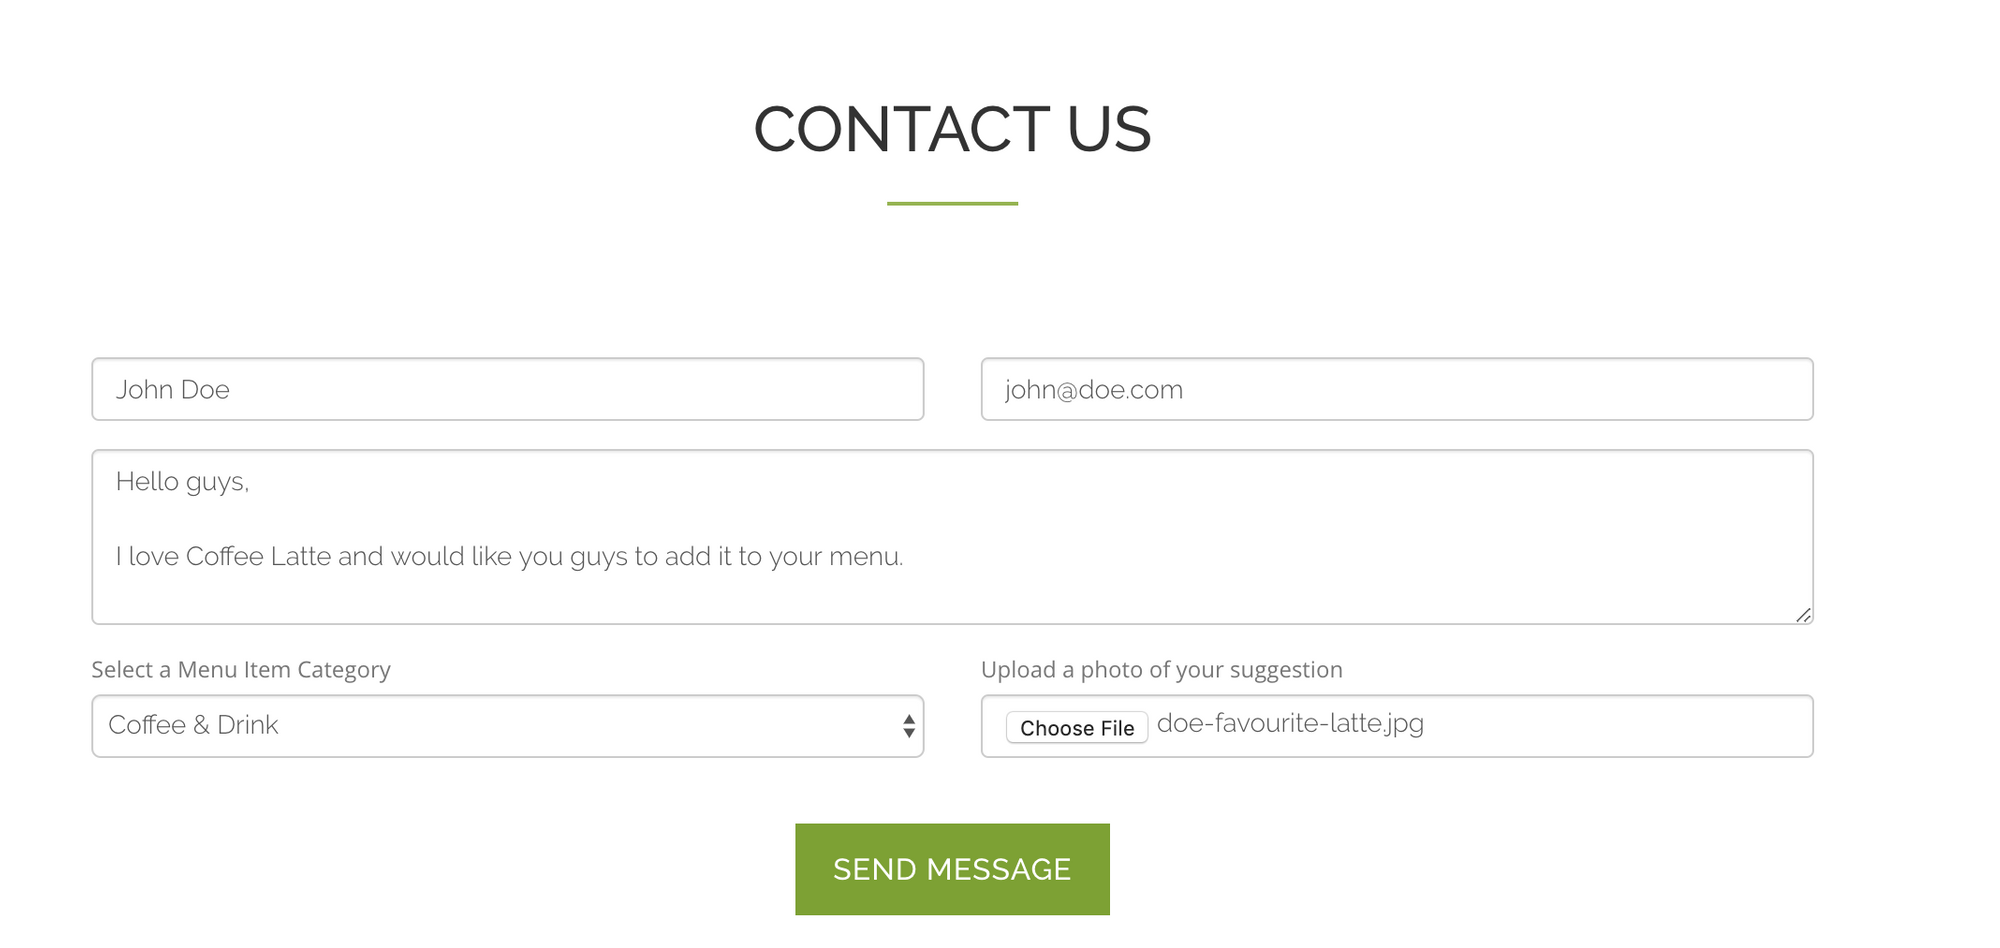
Surreal CMS Demo Site Contact Form Example
Let's walk through the form code. We used several classes of Surreal CMS to make the form working on the site.
-
cms-includetag with a specificidtag for the top div. This allows us to use our contact form on many pages of your site. Find more info aboutcms-includeon Surreal CMS docs here. - We set
cms-editableclass for labels which allows us to edit these values from Surreal CMS. Find more info about content regions andcms-editableon Surreal CMS docs here.
7. Publish your demo site to finish setting up your form for your Surreal CMS enabled website. Here's how your contact form looks like:
8. Send a new submission from your site and see it on your form detail page.
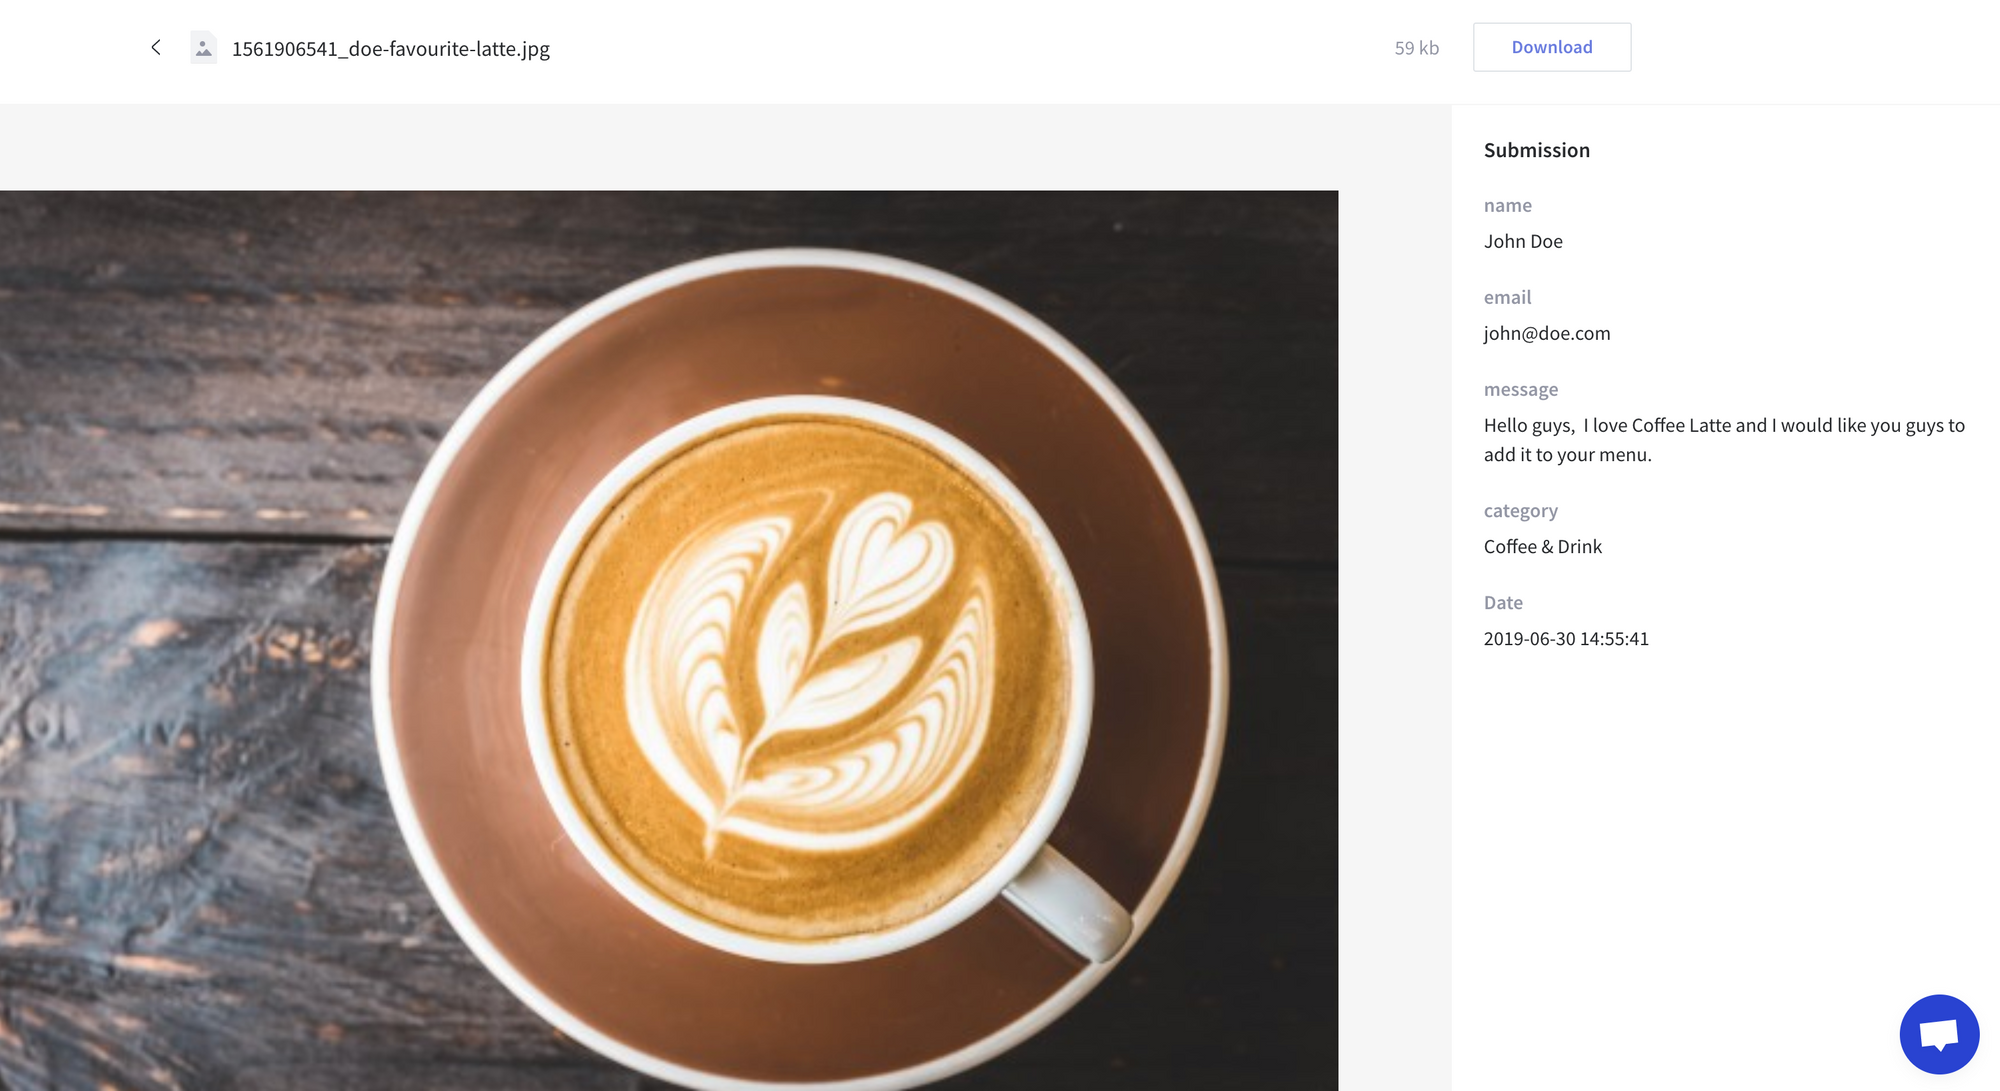
9. That's it! Your Surreal CMS enabled site has connected and your contact form submission data has been sent to Getform successfully.
Bonus: Here's another form sample that is ready to embed to your Surreal CMS dashboard without any style. You can copy&paste, style it according to your website's rules and managing your form endpoint immediately.
<!-- Contact Section -->
<div class="container cms-include" id="contact-form-getform">
    <div id="contact-us-title" class="cms-editable">
      <p>Contact Us</p>
    </div>
    <form accept-charset="UTF-8" action="https://getform.io/f/22ce0643-3efe-4777-b0b5-b4c8cc219d33" method="POST" enctype="multipart/form-data">

      <label for="email-address" id="email-address-label" class="cms-editable">Email</label>
      <input id="email-address" name="email" type="email" required>

      <label for="name" id="name-label" class="cms-editable">Name</label>
      <input id="name" type="text" name="name" placeholder="Name" required="required">

      <label for="message" id="message-label" class="cms-editable">Message</label>
      <textarea id="message" name="message"></textarea>

      <label for="platform-name" id="platform-name-label" class="cms-editable">Favourite Platform</label>
      <select id="platform-name" name="platform" required="required">
        <option>Github</option>
        <option>Gitlab</option>
        <option>Bitbucket</option>
      </select>

      <label for="file" id="file-label" class="cms-editable">Upload a file</label>
      <input type="file" name="file" id="file" required>

      <button type="submit">Submit</button>
    </form>
  </div>
Surreal CMS Contact Form Template
Want to do more with your form data? Use our Zapier Integration
As you can see from the tutorial, with Getform you can easily plug and play your form backend with services like Surreal CMS. You can also accept file attachments, receive email notifications and export the form data in CSV format.
But there is also a way to feed your form data using Webhooks or via Zapier integration to connect other applications like Slack, MailChimp, Google Spreadsheets, Hubspot, Trello or thousands of others.
Just head over to our related documentation page to get started!
We keep enhancing Getform by listening to you, leave us your feature requests at https://getform.nolt.io or vote on the existing requests
Checkout our Codepen page and Documentation for more information and guides.
If you would like help getting Getform setup with Surreal CMS, feel free reach us out at info@getform.io.
Mertcan from Getform
Form backend platform for designers and developers