

HTML tags can be considered as special keywords which help web browsers to define how to format and display the content within the website. Since HTML forms are commonly used to collect input from website visitors to receive feedback, support requests, job applications, or more, form-related HTML tags are a lot more interactive than other HTML tags.
In this guide, we will go over all the form-related HTML tags starting from the most known ones like <form> and <input> tags and then continue with the ones that might be very helpful and interesting to use such as <output> and <progress> tags for shaping your HTML forms in the best way.
HTML Form Tag
The <form> tag is used for creating an interactive section, a form to gather user inputs within your website. It defines the area that contains all the form elements for data submission.
The most common and important attributes used with the <form> tag are "action" and "method". The "action" attribute specifies the URL of the service that will receive and process the data after form submission. The "method" attribute on the other hand defines the HTTP method for sending the data which can get the value of either GET or POST.
Here’s how the <form> tag is used;
<form action="https://getform.io/f/{your-unique-form-endpoint-goes-here}" method="POST">
All the form content goes here..
</form>Input Tag
The <input> tag is the most popular one since it helps you to define different kinds of input fields such as text, email address, phone number, dates, file upload, radio buttons, and more.
In order to specify the input field, the "type" attribute is necessary to use with the <input> tag. Another useful attribute is "name" which defines the name of the input to be recognized and get the value when it’s sent to the server. You can also use the "placeholder" attribute to give a hint to users about what kind of value is expected from the input field. The "required" attribute is also important for specifying the input fields that must be filled out before submitting the form.
Let’s add some use cases of the <input> tag for different kinds of input fields into the <form> tag;
<label for="name">Full Name*:</label>
 <input type="text" name="name" placeholder="Your Name*" required="required">
<label for="email">Email Address*:</label>
 <input type="email" name="email" placeholder="Your Email*" required="required">
<label for="phone">Phone Number</label>
<input type="tel" name="phone" placeholder="1-(555)-555-5555">
  <label for="male">Male</label>
  <input type="radio" name="gender" />
 <label for="female">Female</label>
 <input type="radio" name="gender" />
<label for="other">Other</label>
<input type="radio" name="gender">
Label Tag
The <label> tag is used for creating a caption or label for input elements on your web form. It provides a short description of the input field.
You can use the <label> tag by placing the form control inside it or by adding the "for" attribute which is used for specifying the input element that is bound to the label.
We will add the <label> tag to existing input fields and also radio buttons that we will be creating by using <input type=”radio”>;
Select & Option Tags
If you need a drop-down menu with various options in your form, then you can use the <select> and the <option> tags. The <select> tag is used for defining the selection or drop-down list itself. All the options in the list are represented by the <option> tag.
Regarding the attributes, you can use the "name" attribute with the <select> tag as well. To define a value for each option in the drop-down list, you should add the "value" attribute to the <option> tag.
Here’s an example of how it looks like;
Textarea Tag
The <textarea> tag is used for creating multi-line text areas that can have an unlimited number of characters. It is a very useful tag for having a form field to gather visitor’s comments or messages.
If you want to specify the size of the text area, you can add "rows" and "cols" attributes. The "name" attribute is also used here to define the name that is sent by the browser. Another one is the "maxlength" attribute which allows you to limit the number of characters that can be entered in the text area.
Here’s an example;
Optgroup Tag
As one of the lesser-known form-related HTML tags, The <optgroup> tag can be very useful if you want your visitors to choose an option from a long drop-down list in an easier way. You can group related <option> elements within the <select> list by using the <optgroup> tag. You can add the "label" attribute to define a common name for each group of options.
Let’s use the <optgroup> tag for the drop-down list that we created earlier;
Progress Tag
As one of the tags introduced with HTML5, the <progress> tag is used for creating a progress bar to display the progress of tasks like uploads or downloads. The most common use case of the tag in web forms is to represent the progress of a file uploading.
To determine the progress value, you can use “value”, “min” and “max” attributes with the <progress> tag.
Let’s create a progress bar for file uploading which will be displayed by the <input type="file">;
Fieldset & Legend Tags
You can think of the <fieldset> tag as a container for the related form elements. It is helpful to make your form more understandable for users. The <legend> tag is there to add a title for the box that is created by the <fieldset> tag.
Let’s use these tags to group some of the form elements mentioned earlier;
Output Tag
As a newly introduced and lesser-known tag compared to others, the <output> tag is used for displaying a result of a calculation or a user action performed usually by a script.
You can use the "name" attribute to indicate a name for the <output> tag. To define a unique id for any element in an HTML document, you should use an "id" attribute which allocates a unique identifier used by CSS or javascript to perform certain tasks. Another attribute that can be used with the <output> tag is the "for" attribute. It specifies the relationship between the result and the elements that are used in the calculation by listing the "id" attributes.
Let’s demonstrate one of the <output> tag’s use cases built with the help of <input type = “range”> ;
Button Tag
As its name signifies, the <button> tag is used for creating clickable buttons within your HTML form. You can also create buttons by using the <input type=”button”> but you can not add a text inside the button without the "value" attribute. You should add the "type" attribute to define the type of the button that is sent by browsers.
Here’s how it is used;
<button type="submit">Submit</button>
That’s it!
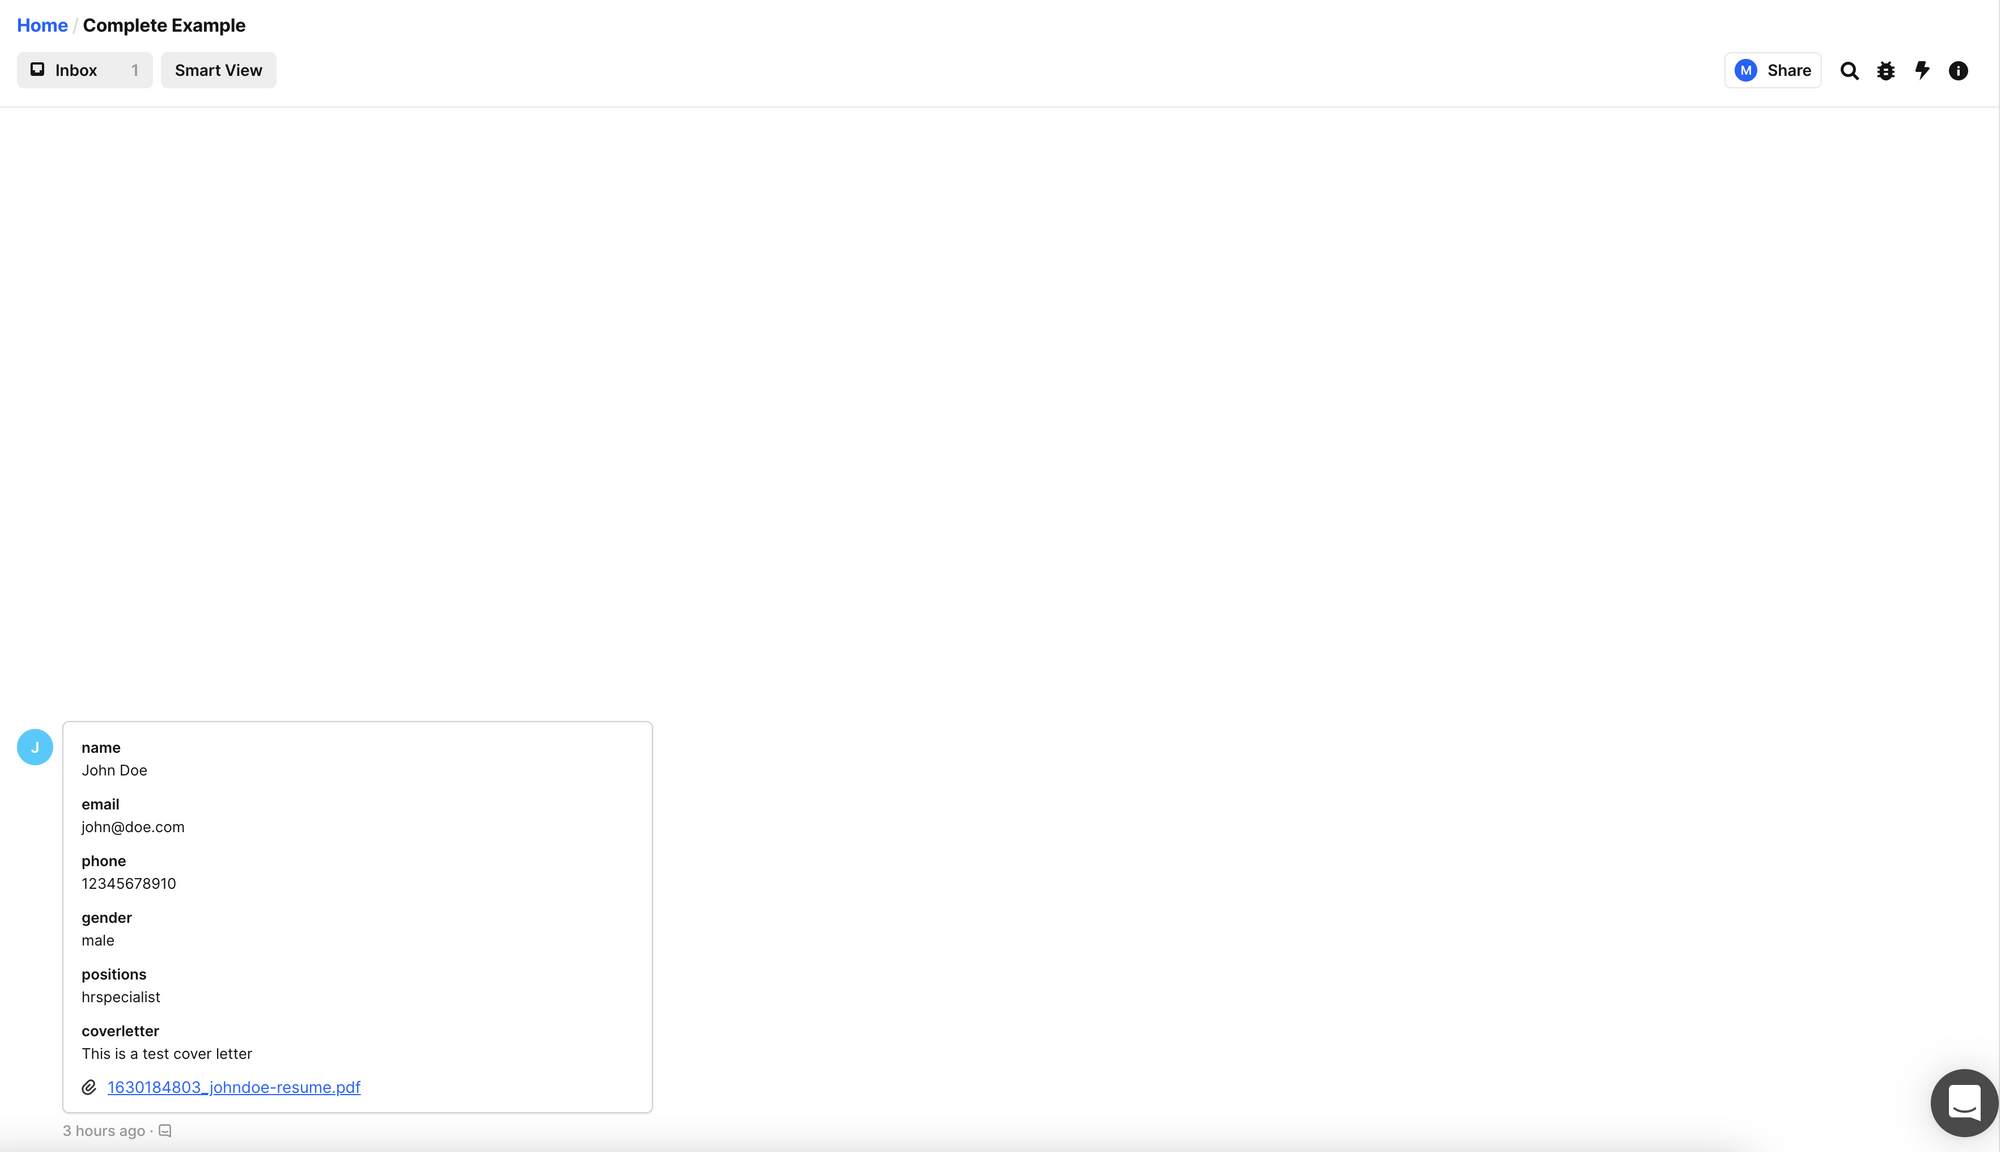
Lastly, let’s create a complete Job Application form with the form related HTML tags that we covered earlier.
This example form contains the <form> tag with enctype="multipart/form-data" attribute to allow file uploads, <fieldset>, <legend> , <label>, <select>, <option> <optgroup>, <textarea>, <progress> and <input> tags and finally to submit the data <button> tag.
To submit the data, we will place a unique form endpoint generated on Getform and place it to action attribute, once submitted here's how it will look on Getform dashboard.
Conclusion
We hope you will find this guide useful for discovering major form-related HTML tags. If you liked this post, don't forget to share and follow us on LinkedIn and Twitter for more updates from our blog!
If you would like help setting up Getform on your HTML forms, feel free to reach us out at info@getform.io
You can find more information and code samples for different use cases from the resources below.