

Ghost is a free and open source blogging platform written in JavaScript and it powers an incredible range of websites; from individual bloggers who are just getting started, to large teams of writers and editors at some of the largest organisations in the world. Currently more than 2 million websites running on Ghost including Getform's Blog that you are currently reading!
We know that setting up a contact form on your website site is a way for your audience to get in touch with you directly while they are enjoying your posts. In this tutorial we’ll show you how to create a Ghost blog, adding a customized theme and add a custom contact form directly into your Ghost theme using Getform.
Lastly to provide more control of where the form can be added, we're going to take this one step further by creating a custom post template which will allow all authors of your site to add a form to any page using a single drop-down menu on your customized theme.
How to Create a Ghost Contact Form
1. Setting up your Ghost Site
As first step, we will install the Ghost-CLI, which is a command line tool to help you get Ghost installed and configured for use, quickly and easily.
npm install ghost-cli@latest -gthen we will install Ghost. In your terminal, cd into an empty directory and run the install command:
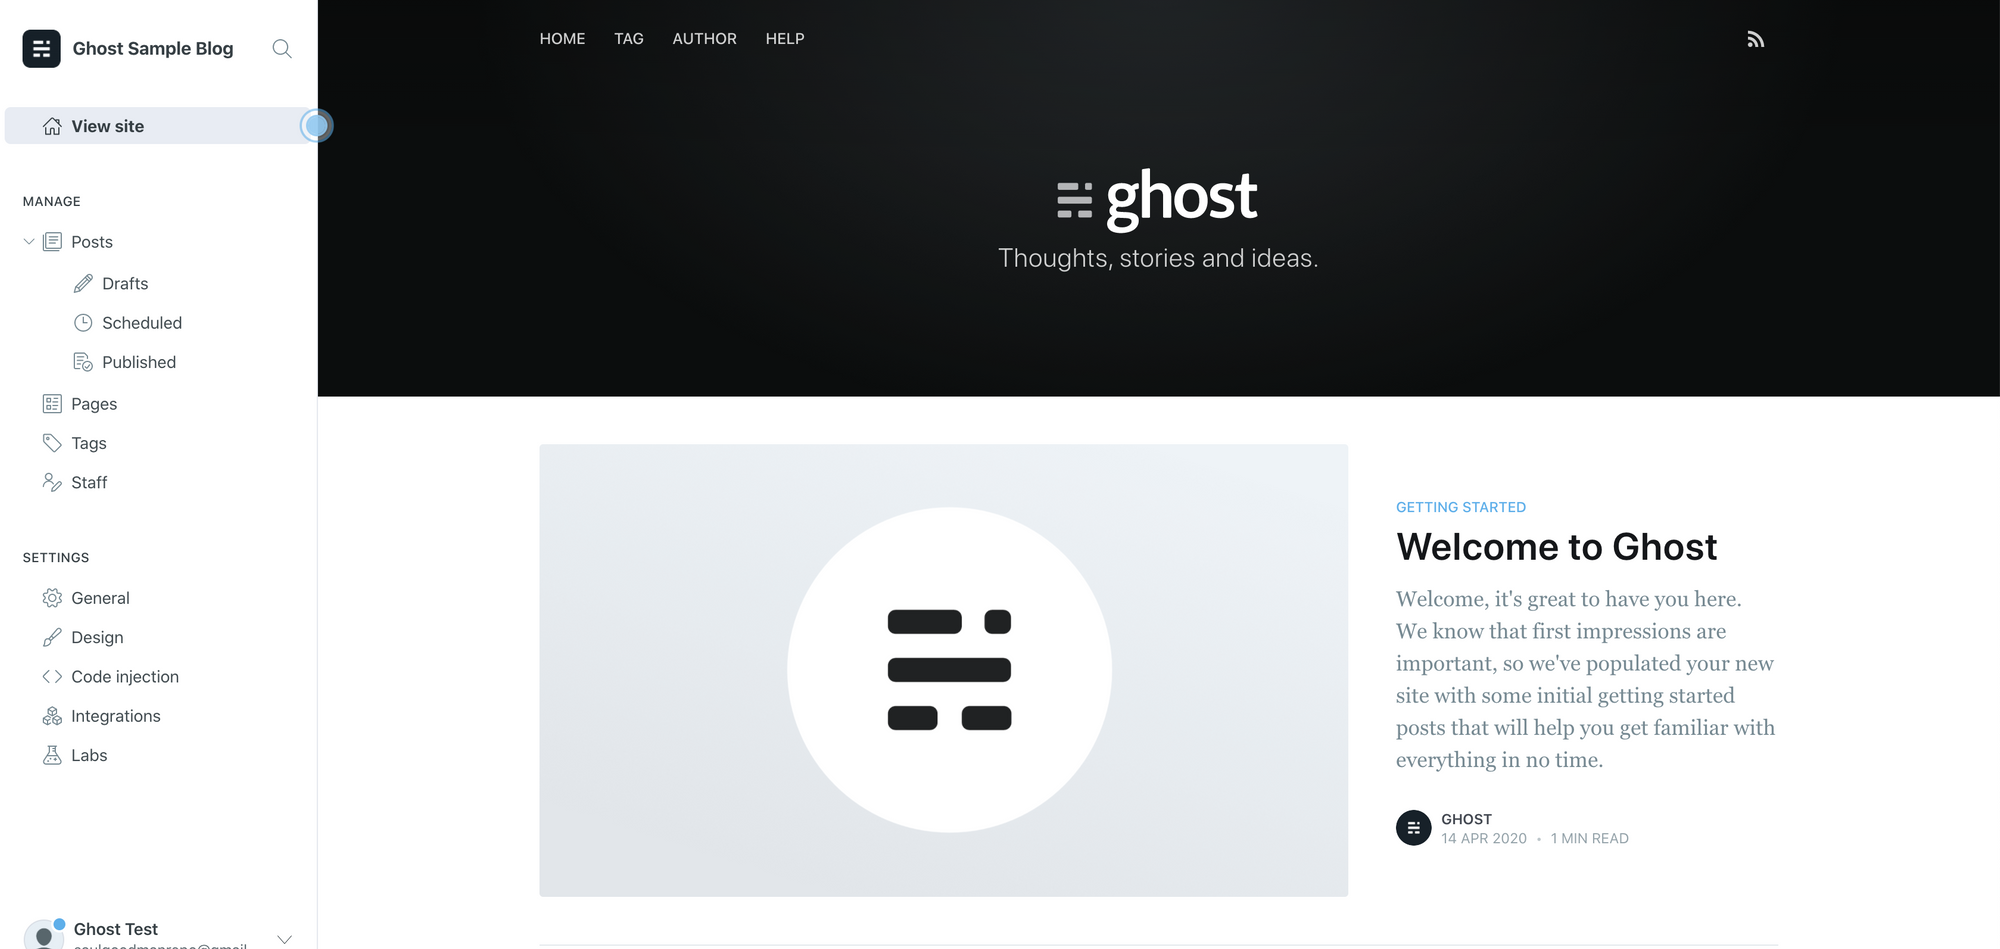
ghost install localOnce the install is finished you'll be able to access your new site on http://localhost:2368 and http://localhost:2368/ghost to access Ghost Admin. It will come with a default Ghost theme called Casper. The admin will look like below:

2. Creating a custom page template
With our Ghost site created and running, we can now start creating a custom post template.
- Create a new file at the root of your theme called
custom-page-with-getform.hbsand open it in your favorite code editor. We will be using this template for our reusable contact form setup. - Within the new custom page template file add the following code:
{{!< page}}
{{#contentFor "form-area"}}
  <!-- form here -->
{{/contentFor}}
The line {{!< page}} will take the original page.hbs template in the theme and insert everything below it into the page template.
3. Define a content block
In order for the code in our new custom template to be inserted in the right place we need to define a content block. A content block can be defined using the {{#contentFor "example"}}...{{/contentFor}} helper, as shown in the code sample above.
Open the page.hbs template in your code editor and locate a place in which you want the form to appear and add the following:
{{{block "form-area"}}}Since the block has been referenced anything between the {{#contentFor "form-area"}}...{{/contentFor}} block helper will be inserted wherever the code has been placed at.
4. Create your Ghost contact form using Getform
- If you haven’t created one already, sign up to Getform or login with your existing account to Getform.
- Click to “+” button on your forms dashboard page to create a new form then name it e.g. “Ghost Blog Contact Form" and copy the unique form endpoint that belongs to the form you have just created. With that unique form endpoint add the code block below between the “contentFor” block:
<form class="contact-form" action="https://getform.io/f/9de64cfa-0a4a-4fd2-b385-687e2059cae6" method="POST>
  <label for="full-name">Name</label>
  <input type="text" name="name" id="full-name" placeholder="First and Last" required>
  <label for="email-address">Email Address</label>
  <input type="email" name="_replyto" id="email-address" placeholder="Your email address" required>
  <label for="message">Your Message</label>
  <textarea rows="5" name="message" id="message" placeholder="Your message" required></textarea>
  <input type="submit" value="Submit">
</form>- Note that unique form endpoint you have created from Getform is placed to the
actionattribute of the form tag. - If you would like to accept file attachments to your form, you should also add
enctype='multipart/form-data'attribute to your form tag as well as the file input. You can check more setup details here.
5. Styling your contact form
Next we need to add some style and layout to our form. Depending on your theme, you might already have some default styles for form elements. If you're using Casper, like in this tutorial, you can use the following CSS:
.contact-form {
    display: grid;
    grid-template-columns: 1fr 1fr;
    grid-gap: 0.2em 1em;
  }
  .contact-form input,
  .contact-form textarea {
    width: 100%;
    padding: 0.4em 0.6em 0.5em;
    color: #111;
    font-family: -apple-system, BlinkMacSystemFont, Segoe UI, Roboto, Oxygen,
      Ubuntu, Cantarell, Open Sans, Helvetica Neue, sans-serif;
    font-size: 0.95em;
  }
  .contact-form input:focus,
  .contact-form textarea:focus {
    outline: 1px solid #3eb0ef;
    outline-offset: -1px;
  }
  .contact-form label[for="full-name"],
  .contact-form label[for="email-address"] {
    order: -1;
  }
  .contact-form input {
    order: 0;
    margin-bottom: 0.6em;
  }
  .contact-form label[for="message"],
  .contact-form textarea {
    grid-column-end: span 2;
  }
  .contact-form input[type="submit"] {
    grid-column-start: 2;
    justify-self: end;
    margin-top: 0.6em;
    background: #3eb0ef;
    color: white;
    width: auto;
  }
Optionally you can use one of default Getform form templates listed on our Codepen.
6. Uploading your customized theme with contact form
Next step is to save your theme changes and upload your theme via the Design view in Ghost admin.
To upload a theme to your publication, go the “Design” settings in Ghost admin and click the “Upload a theme” button. Once uploaded, click “Activate” to activate the theme on the site.
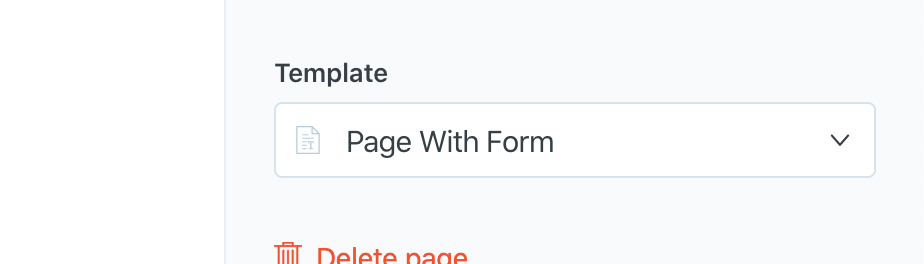
Next, create a new page called “Contact” and use the Template select option at the bottom of the page settings to select the template “Page With Form”.
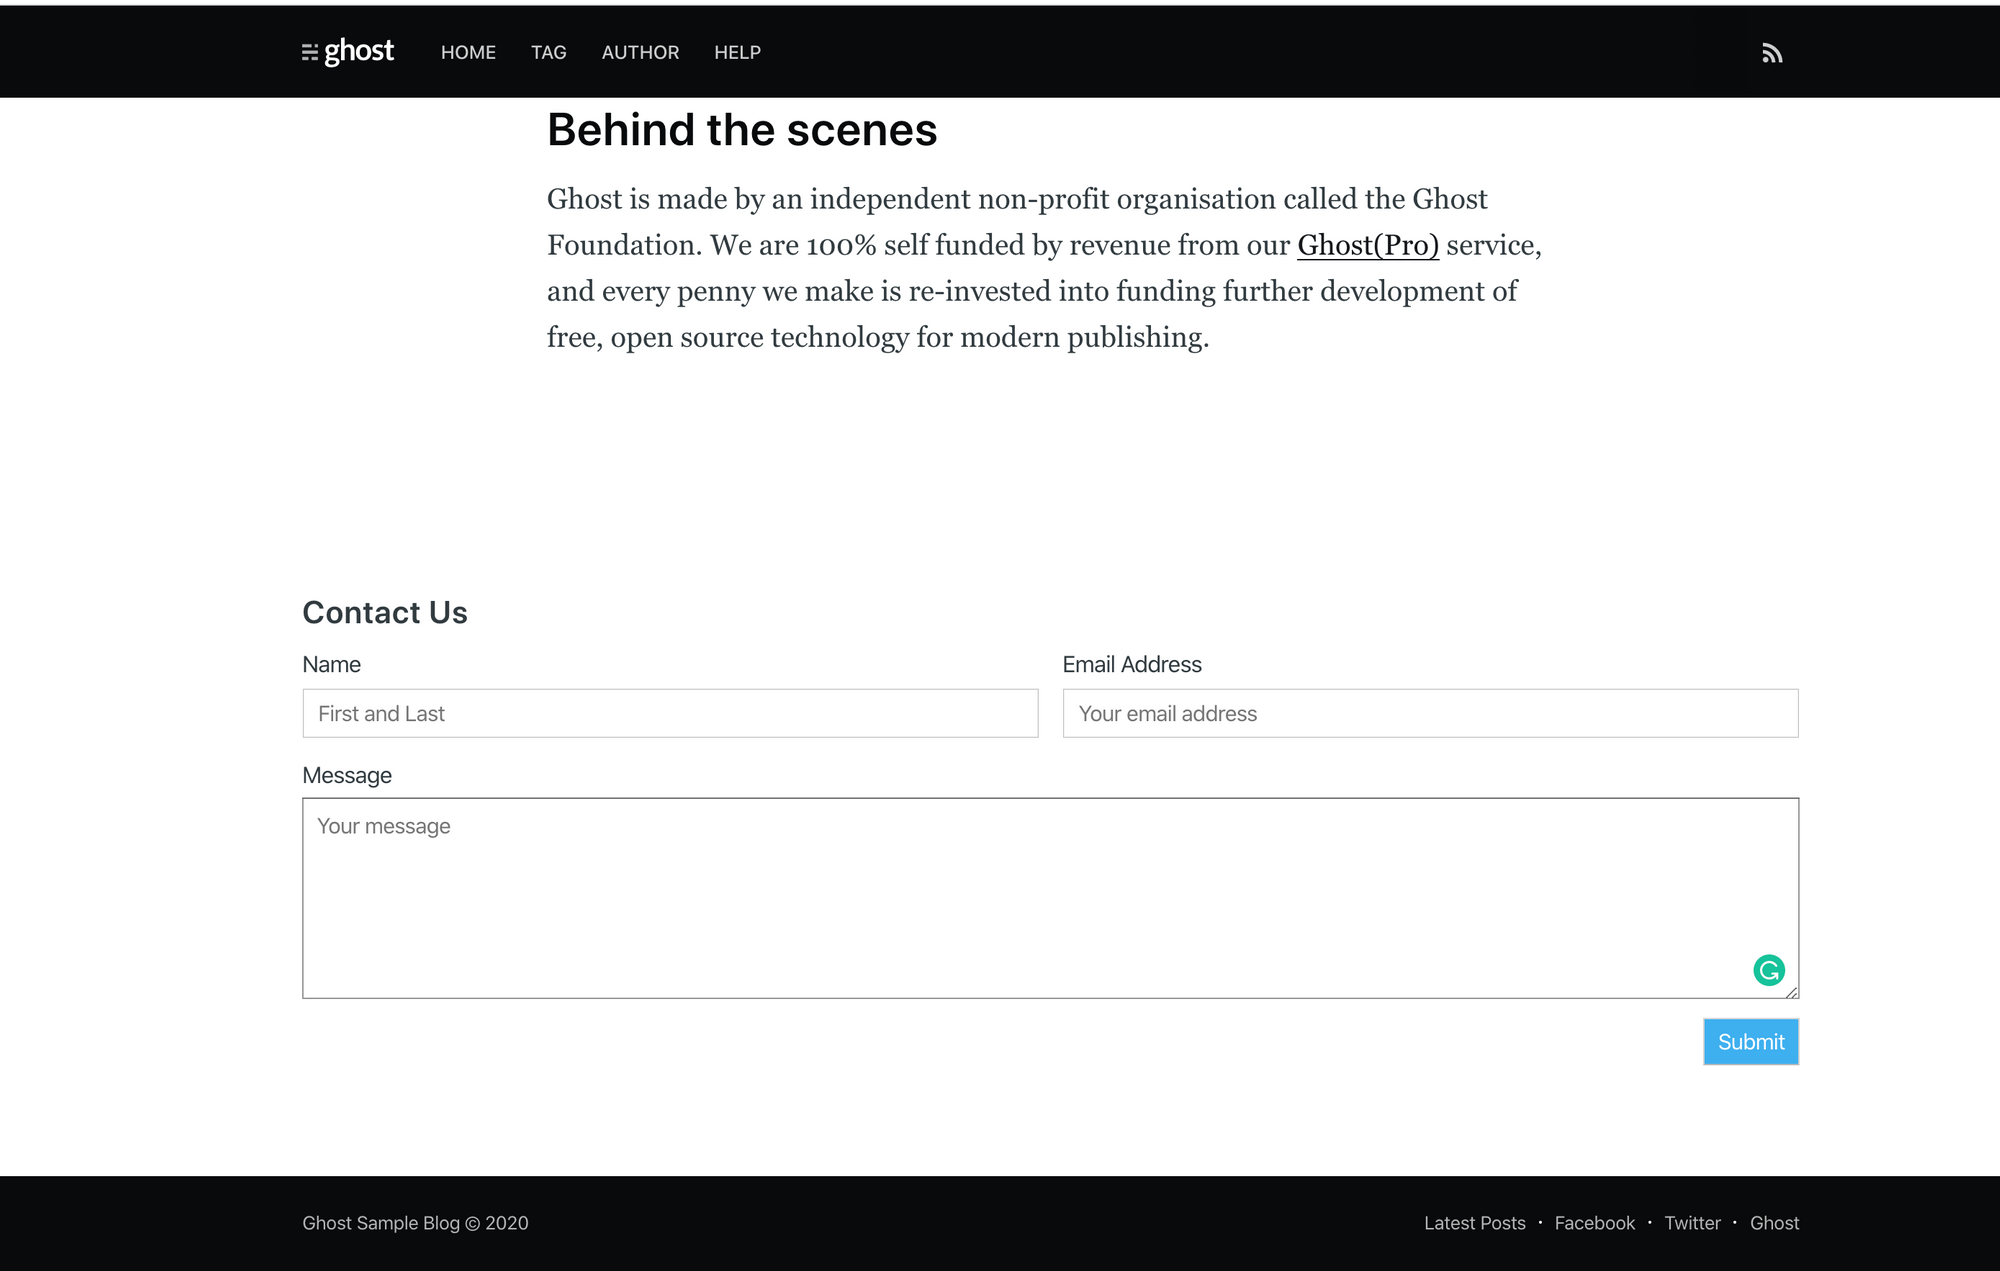
Hit publish and navigate to the page on your site to see the form in action.
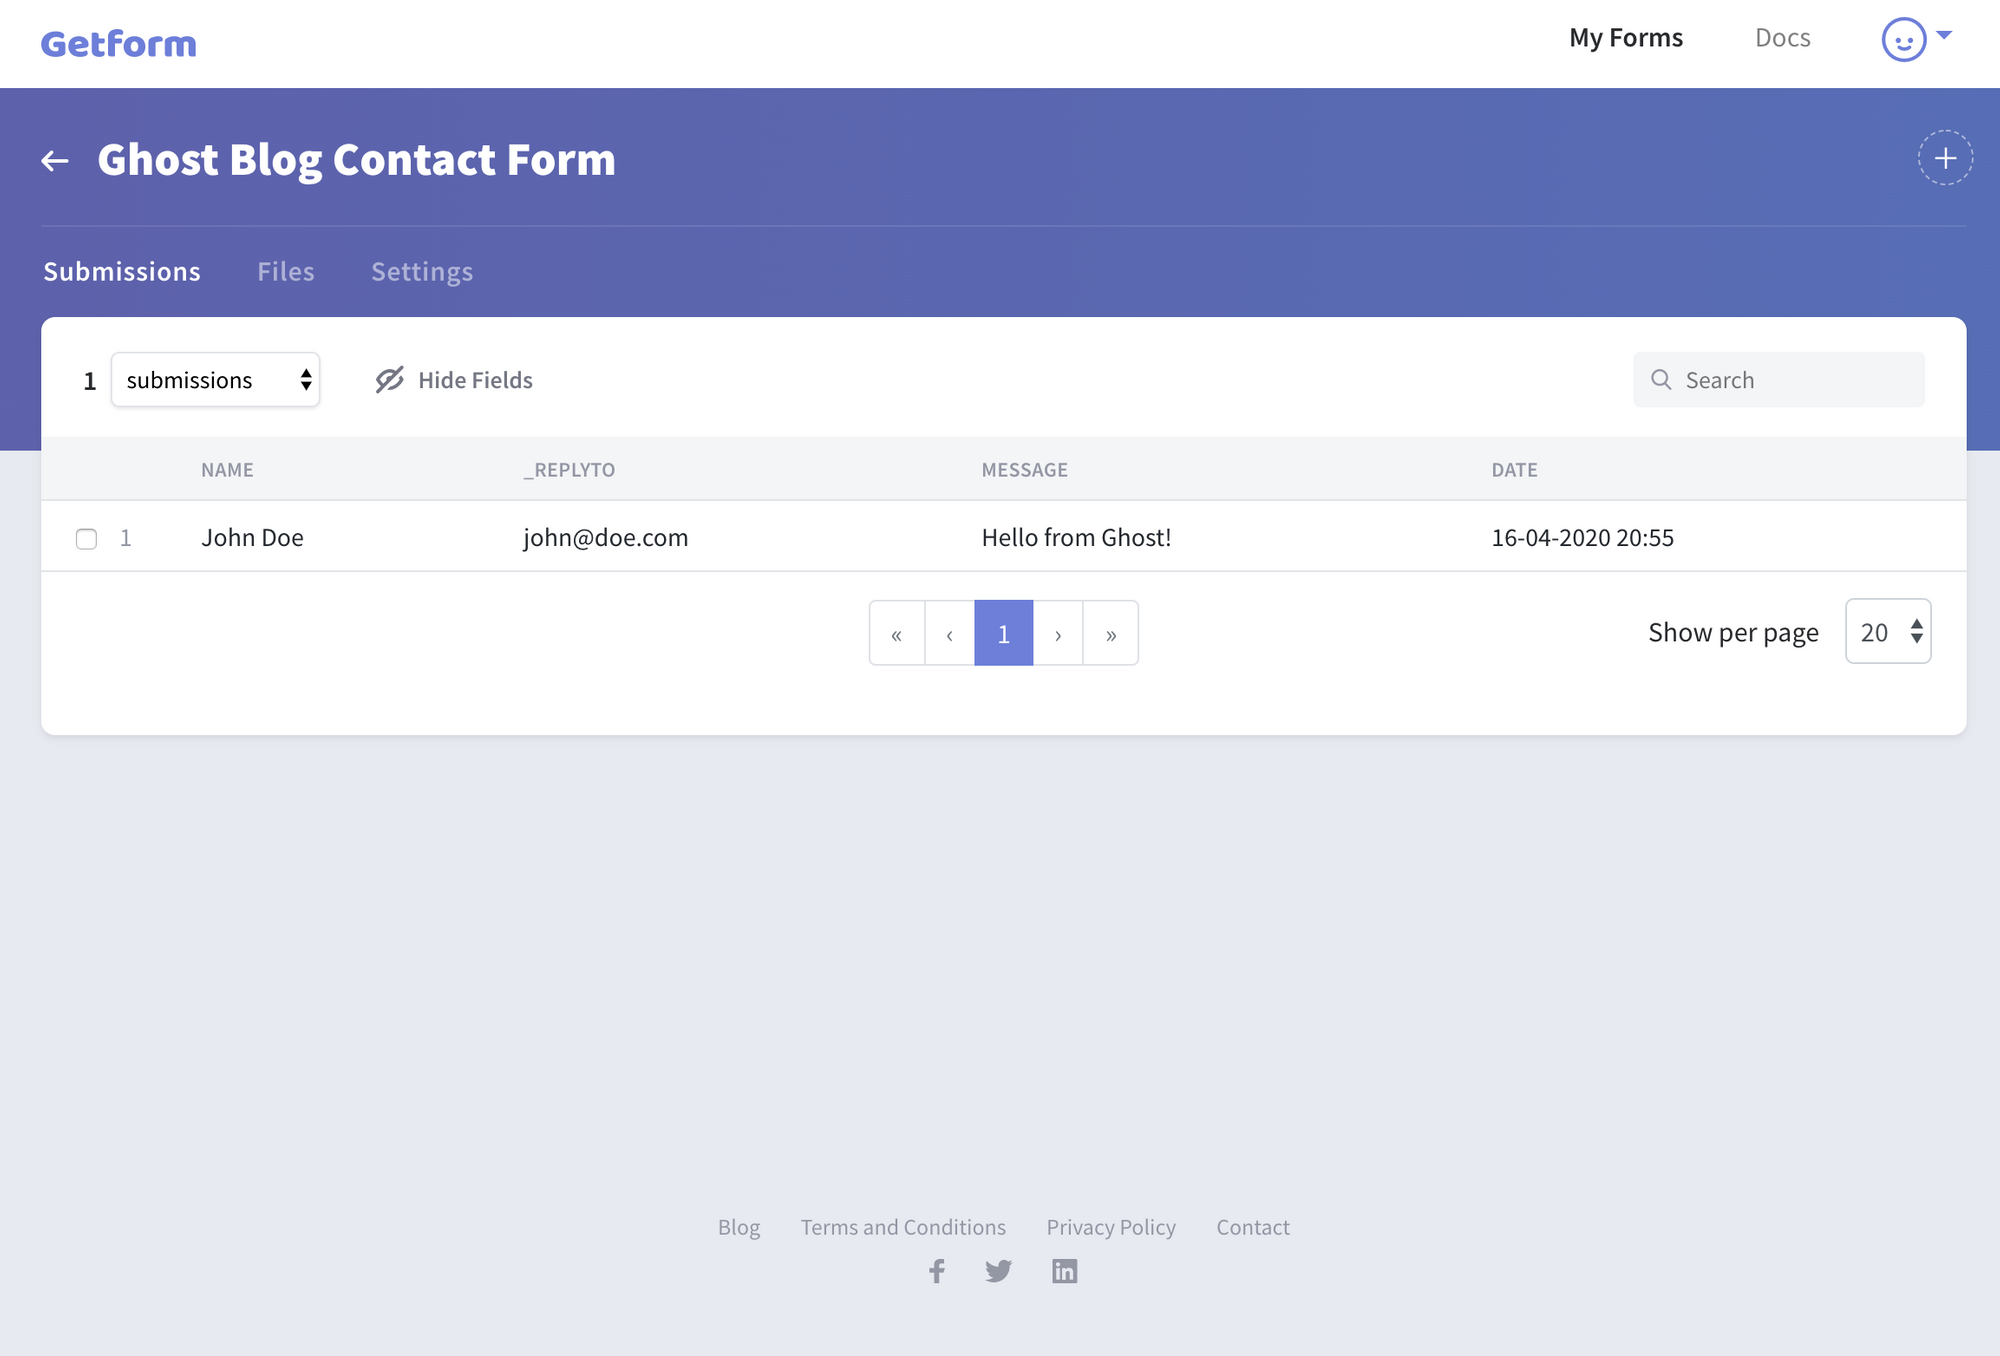
- After you fill the fields and submit it, here is how your form data will look like on your Getform dashboard.
That's it! You have setup a contact form on your customized Ghost Theme.
Improving User Experience
The Getform Thank You Page will be shown to your form submitters by default, but you can change it to one you'd like by upgrading your account to Pro plans.
After you finish the setup, based on your needs you can also set up an email notification from form settings, use our Zapier integration to send your form submission data to 100s of other applications and keep your form submissions spam protected by using reCaptcha integration.
Summary
Well done! Not only have you added a contact form to your Ghost, which will allow you to make direct contact with your site's visitors, but you’ve also used advanced Handlebars theme logic to add a feature while keeping the code changes low.
Getform will handle the contact form submissions on your Ghost site, all with just a few lines of code. It is more flexible and robust solution than what you might get from a form plugin.
BONUS: If you would like to check out the Ghost themes, you can visit the themes section from here: https://ghost.org/marketplace/ and select your preferred one.
Ready to start?
Get started by creating your first form now!
Create your formThank you for reading! We keep enhancing Getform by listening to you, leave us your feature requests or vote on the existing ones.
Checkout our Codepen page, Github page and Documentation for more information and samples.
Need help?
Just drop us a line at info@getform.io and we'll help you out.
Mertcan from Getform
Form backend platform for designers and developers