

When you have your HTML form and your form backend ready with Getform, one of the things that you can do is to use it to collect subscribers for your mailing lists.
Mailchimp is a marketing automation platform that helps you share email and ad campaigns with clients, customers, and other interested parties. In this article, you'll learn how to integrate your form backend with your Mailchimp list using Zapier to collect subscribers for your email campaigns.
How to integrate Mailchimp with Getform using Zapier
Prerequisite: You need to have at least one form created and one form submission received to your form on Getform. If you haven’t received your first submission yet, check out the "Collecting form submissions" section in our docs or watch our helper video here to get started.
- Sign in to your Getform account here: https://getform.io/login
- Click "+" button to create a new form for our mailing list and name it as "Subscriber List".
- With that form created, our unique form endpoint is now ready to be inserted to our HTML. Let's add our form and start getting our first submissions. Here is how your HTML form should look like at this point:
<form action="https://getform.io/f/{your-form-endpoint-goes-here}" method="POST" accept-charset="UTF-8">
    <input type="email" name="email" placeholder="Your Email *" required="required">
    <button type="submit">Subscribe</button>
</form>
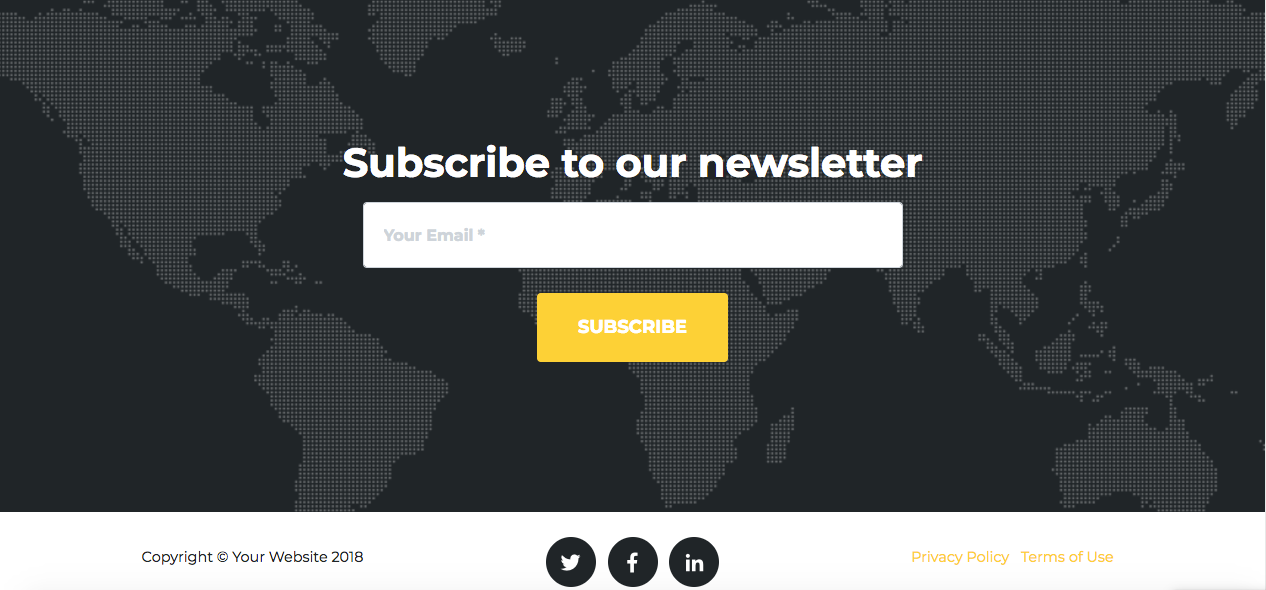
and with a little bit of styling here is how our Subscriber form looks like:
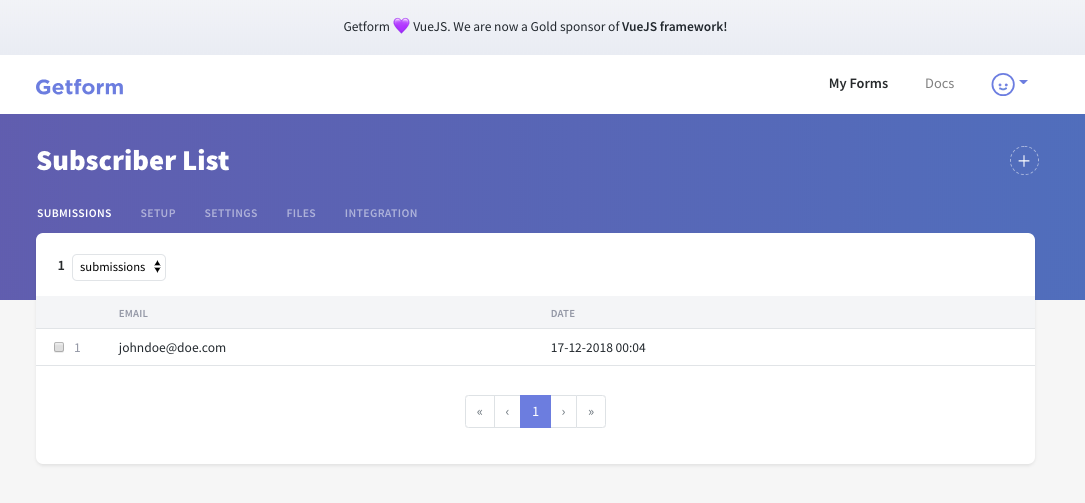
After we send our form submission here is how the Getform form data looks like:
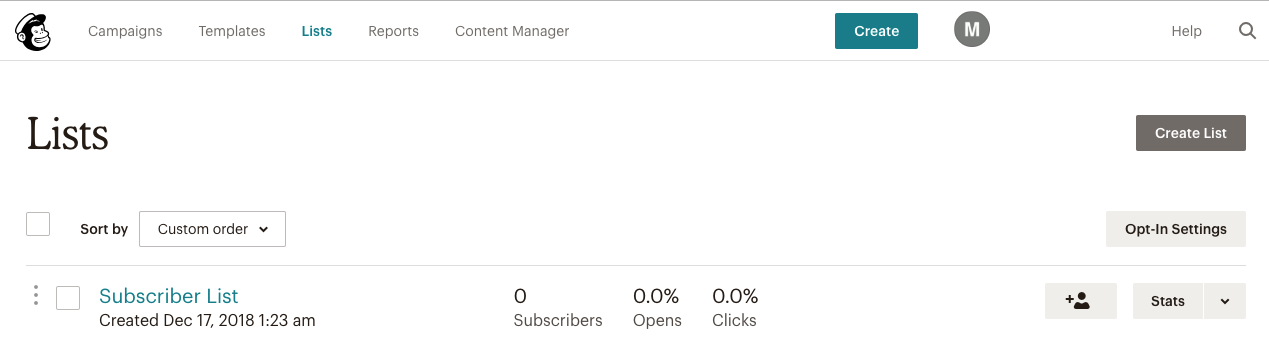
5.Go to Mailchimp and create a new mailing list. Let's give the same name to it. If you already have a ready mailing list on Mailchimp, you can skip this step. Now, our form backend is ready to integrate with our Mailchimp list.
6. On your Getform dashboard, navigate to "Integrations" tab and click to "Connect with Zapier" to start setting up our Getform-Mailchimp Zap.
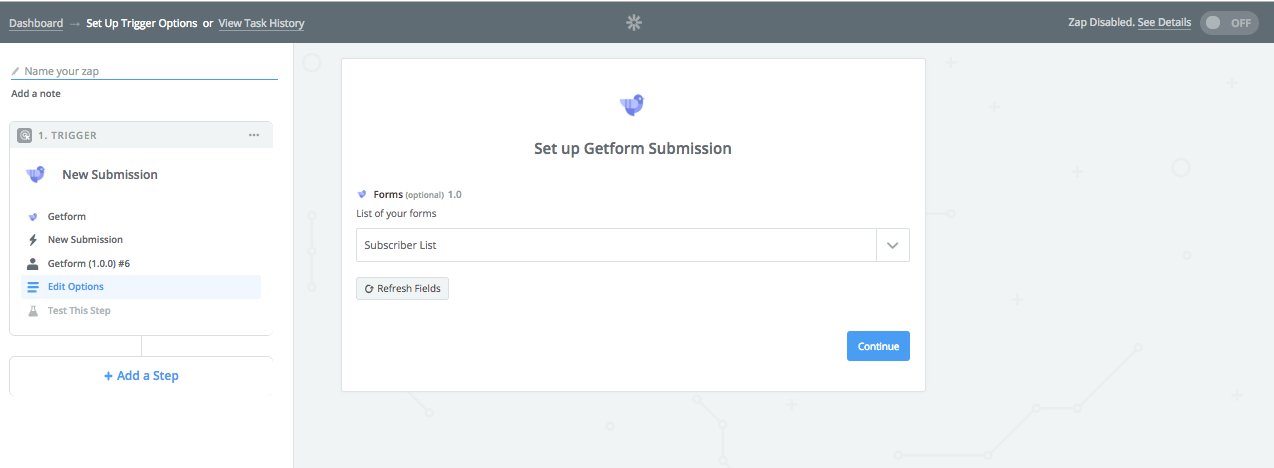
7. Click to "Make a Zap", select Getform as a "Trigger" and paste your API Key you copied from the Integration tab, click “Yes, Continue” button to connect your Getform account to your Zap. Then we will select our form's name to connect with our mailing list as follows:
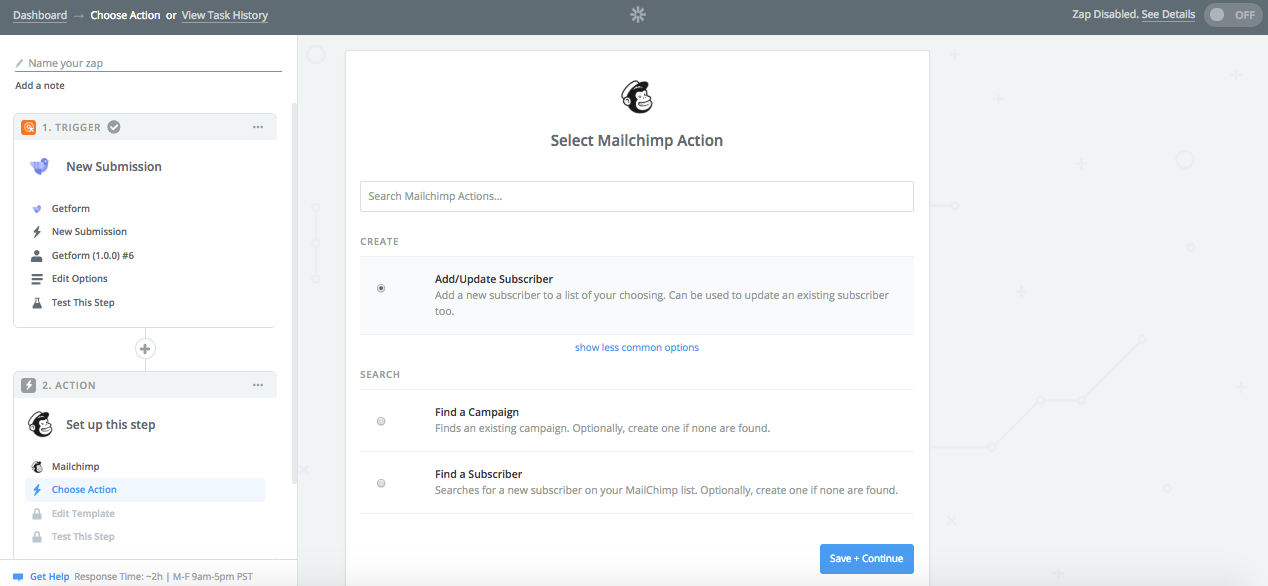
8. After you finish setting up the Trigger step, select Mailchimp as your "Action" step, you can connect your Mailchimp account by entering Mailchimp username and password and select "Add/Update Subscriber" as shown below:
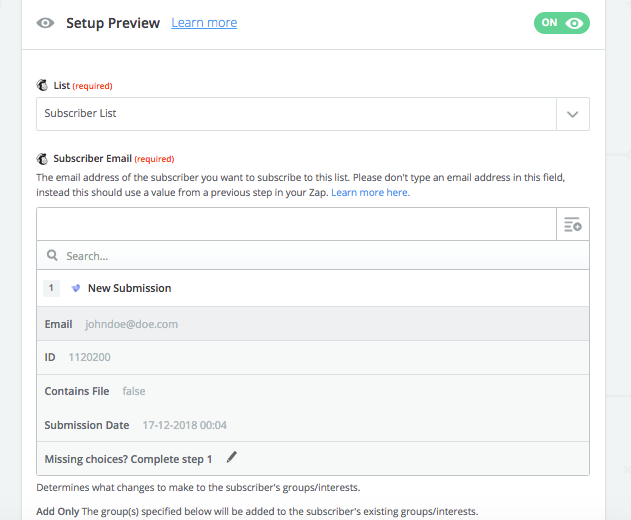
9. Let's select our "Subscriber List" and also select the "Email" field from our form for te Subscriber Email selection then click "Continue" finish setting up our Zap.
10. Now our Zap is ready to test. Let's click to "Test this Step" and check our Subscriber List on the Mailchimp dashboard.
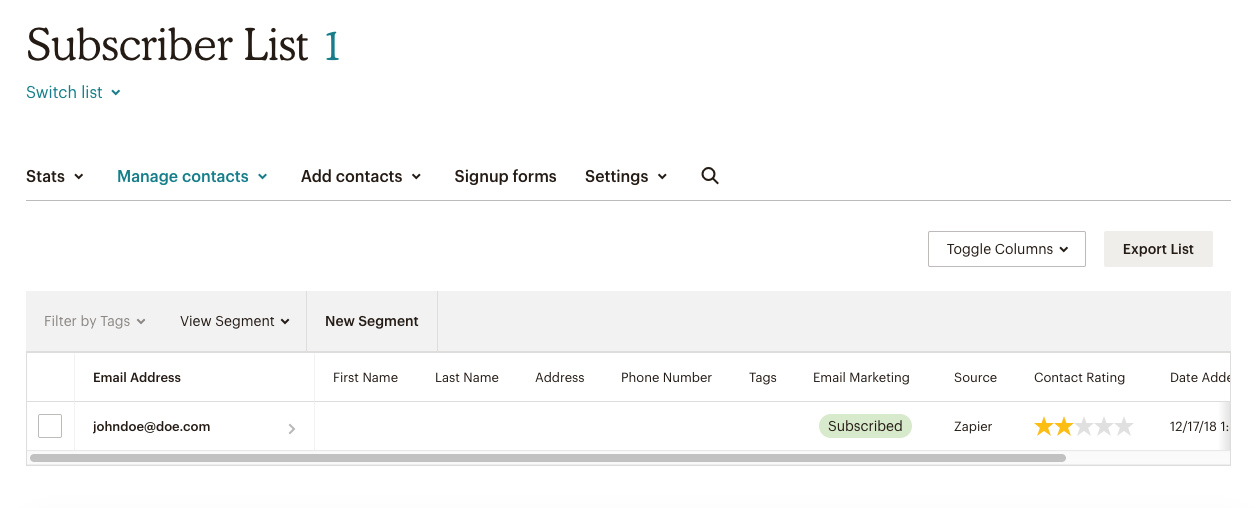
Voila, That's it! Our form submission has been connected and sent to our Mailchimp mailing list successfully. You can also check out Zapier's and our documentation for more details:
Getform Docs: https://getform.io/docs
Zapier Docs: https://zapier.com/learn/getting-started-guide/
If you have any further queries, reach us out at info@getform.io.
Mertcan from Getform
Easy form endpoints for your forms.