
Is there any better way to obtain leads than a form on your website? When your visitor fills out a form in exchange for the offer, you will likely need to store and organize these form submissions properly to speed up your response process and analyze the form data in the best way.
If you don’t want to add your contact form data to your database or spreadsheet manually every single time and using CRM tools like Salesforce already, then you can integrate Getform with Salesforce.
Getform is a modern form backend platform that lets you handle HTML form submissions on any website or application. It works great for static site form management and acts as a data manager for online forms.
Salesforce is a cloud-based customer relationship management software that helps organizations to effectively streamline their sales and marketing operations. Salesforce CRM platform gives all your departments-including marketing, sales, commerce and service a single, shared view of every customer.
In this guide, we will cover how to how to connect your HTML form to Salesforce to automate a lead generation process.
How to create new Salesforce Leads from HTML Form using Getform
Prerequisite: You need to have at least one form created and one form submission received to your form on Getform. If you haven’t received your first submission yet, check out the "Collecting form submissions" section on our docs or watch our helper video here to get started.
- Sign in to your Getform account here: https://getform.io/login
- Click the "+" button to create a new form that we will integrate with Salesforce. Let's name the form as "Salesforce Lead Form".
- With that form created, your unique form endpoint is now ready to be inserted into your HTML form. Let's add our form and start getting our first submissions. Here is how your HTML form should look like at this point:
<form action="https://getform.io/f/{your-unique-form-endpoint-goes-here}" method="POST" accept-charset="UTF-8">
    <input type="text" name="firstname" placeholder="First Name*" required="required">
    <input type="text" name="lastname" placeholder="Last Name*" required="required">
    <input type="email" name="email" placeholder="Your Email*" required="required">
    <input type="tel" name="phone" placeholder="1-(555)-555-5555">
    <input type="text" name="company" placeholder="Doe Co." required="required">
    <button type="submit">Submit</button>
</form>
You can copy the Sales Lead Form template to start off and modify it according to your needs if you'd like
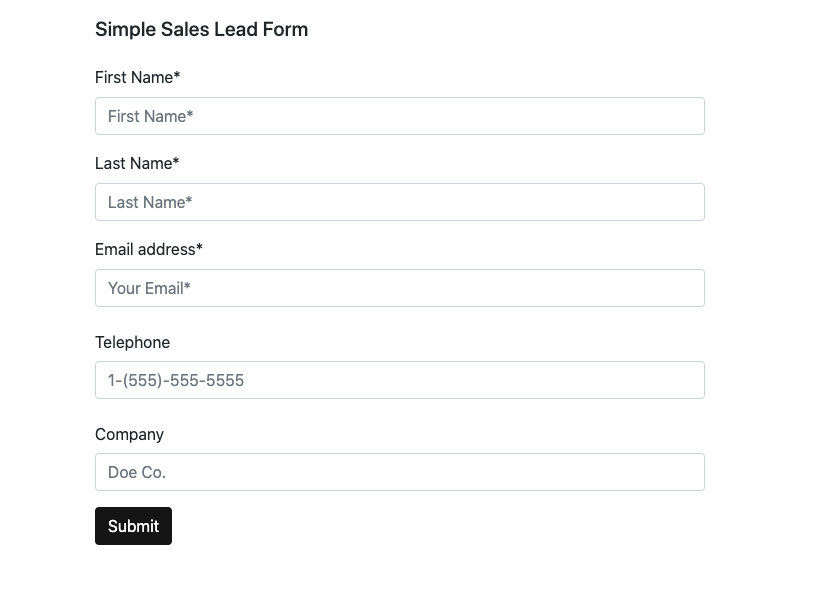
We want to have name, email, telephone and company info to collect as lead details. With a little bit of styling, here is how your Sales Lead Form looks like this:
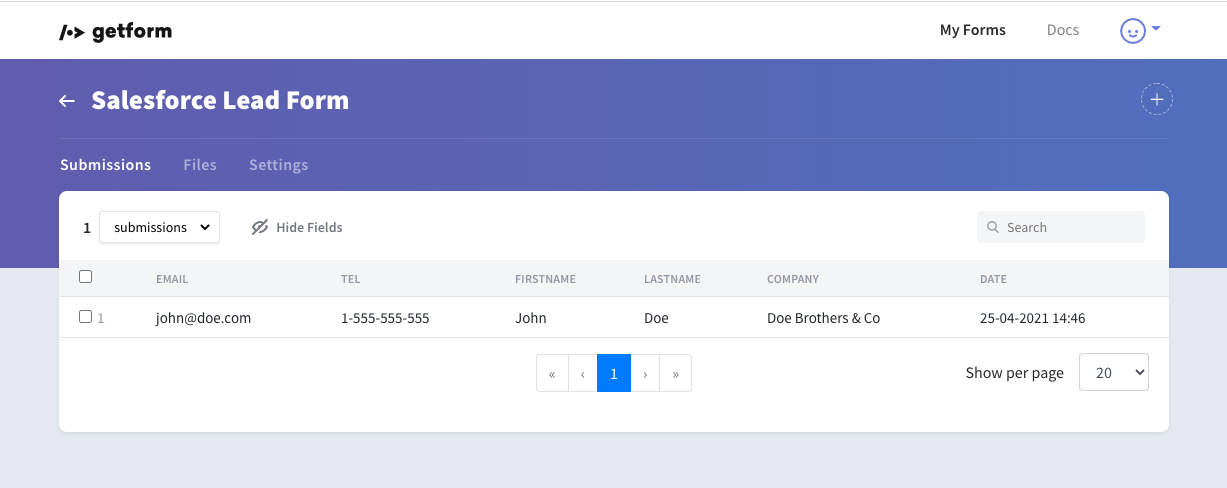
4. After we submit to the form, here is how the Getform form data looks like:
5. On your Getform dashboard, navigate to the "Integrations" tab under your Form Settings and click "Connect with Zapier" to start setting up our Getform-Salesforce Zap.
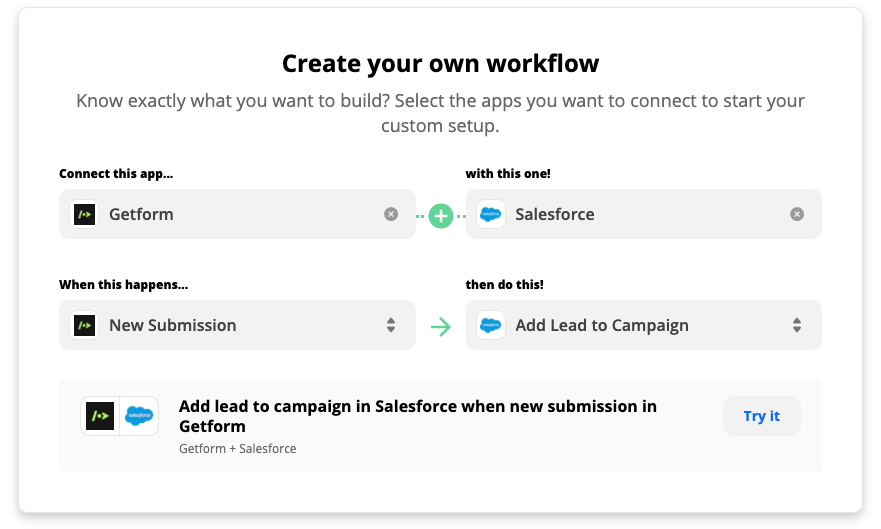
6. Search for Salesforce on the opening screen and go there. Zapier is a great tool to automate your workflows. What we want is to create new sales leads every time a potential lead submits to our form.
To be able to do that, on the Zapier page, select “New Submission” on the “When this happens” field and pick “Add Lead to Campaign” on the “then do this” field. Then you just need to click the “Try it button to start setting up the integration.
To connect your Getform account to your zap, just paste the API Key you copied from the “Integrations” tab and click the “Yes, Continue” button. Then we will select our form's name to connect with our Salesforce account as follows:
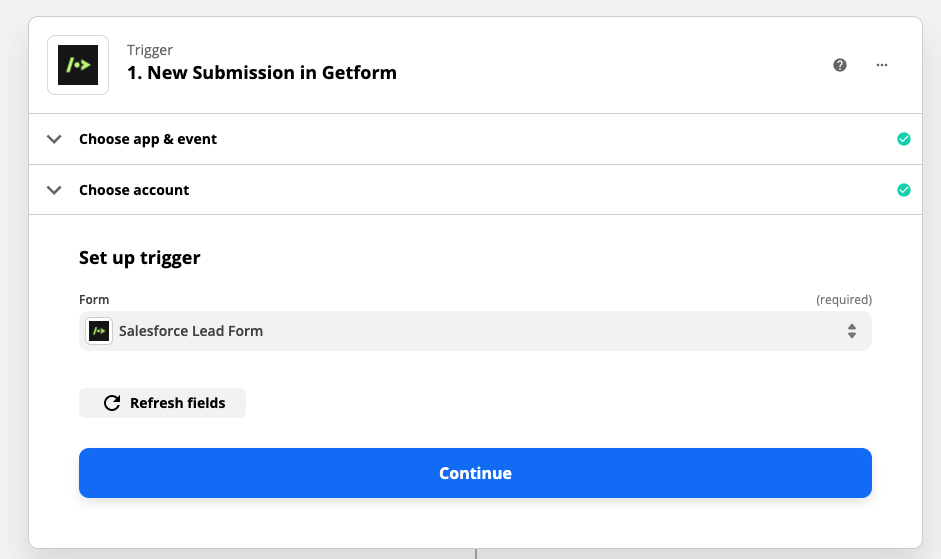
7. After you finish setting up the Trigger step, you just need to click the “Continue” button in the Action stage since Zapier already selected the action app and event for you. Then you need to connect your Salesforce account by signing in on the Zap page.
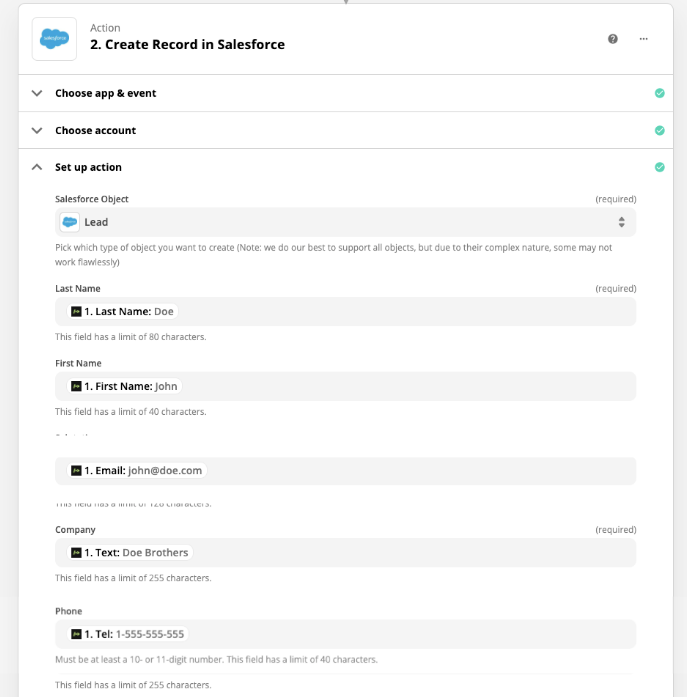
8. We are almost finished! Let's set up an action by selecting our Salesforce account. Then you can add your form submission info to the related fields that you created in Salesforce as follows:
9. Now our Zap is ready to test. Let's click on the "Test&Continue" button and check your Leads section on your Salesforce dashboard.
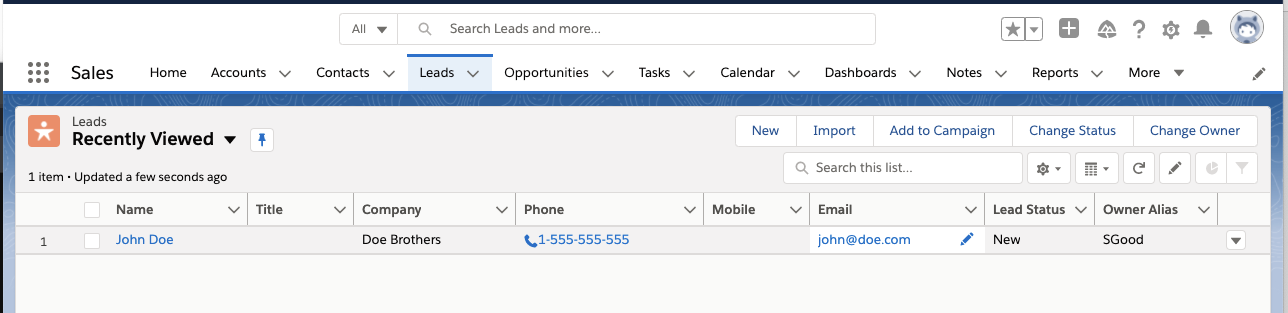
That's it! Your HTML form backend that is managed by Getform is connected to Salesforce to send new leads to your Salesforce Leads section successfully.
Click "Turn on Zap" to finalize the Zap. From now on, your form data can be automatically sent to Salesforce whenever your form is submitted.
You can also check out Zapier's documentation and Getform documentation for more details.
Getform Documentation

Zapier Documentation
 Zapier
If you liked this post, don't forget to share and follow us on Facebook and Twitter for more updates from our blog!
If you have any further queries, reach us out at info@getform.io.
Mertcan from Getform
Easy form endpoints for your forms.